
Introduction
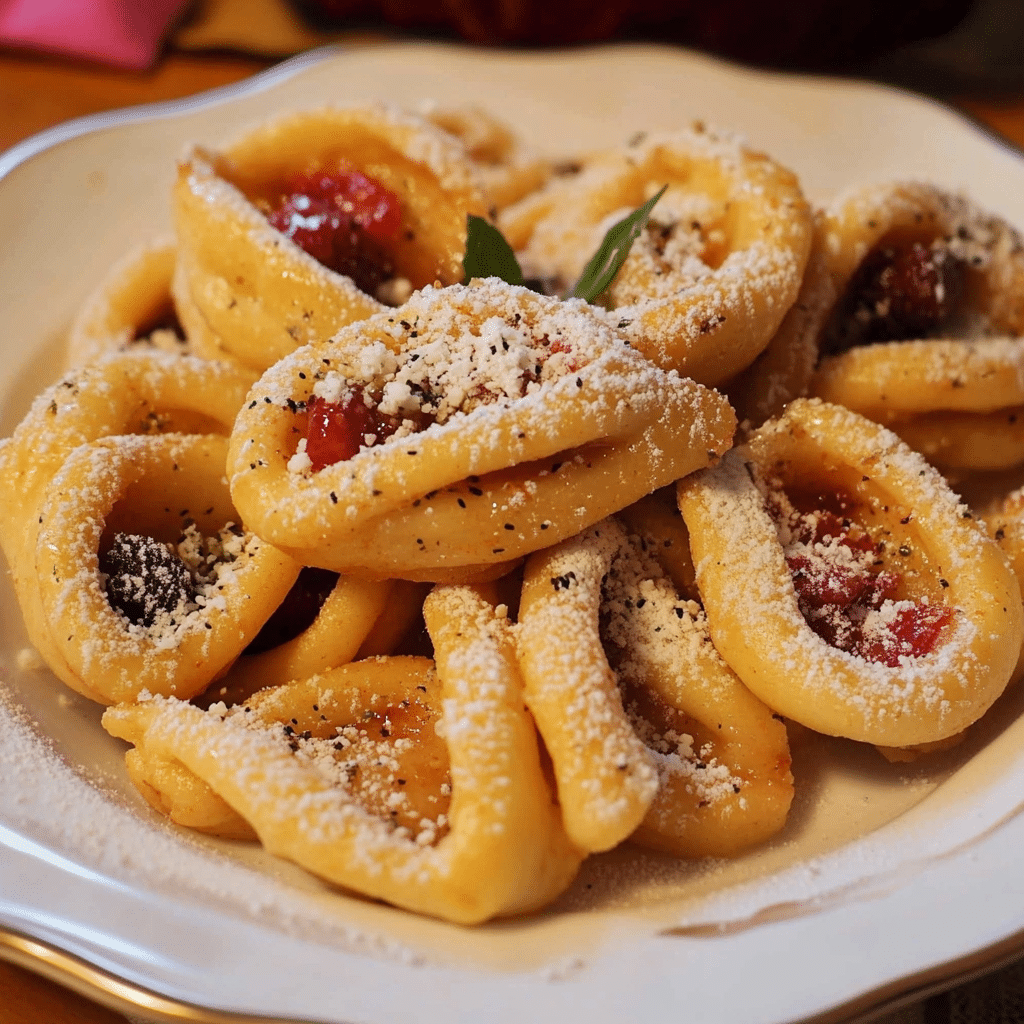
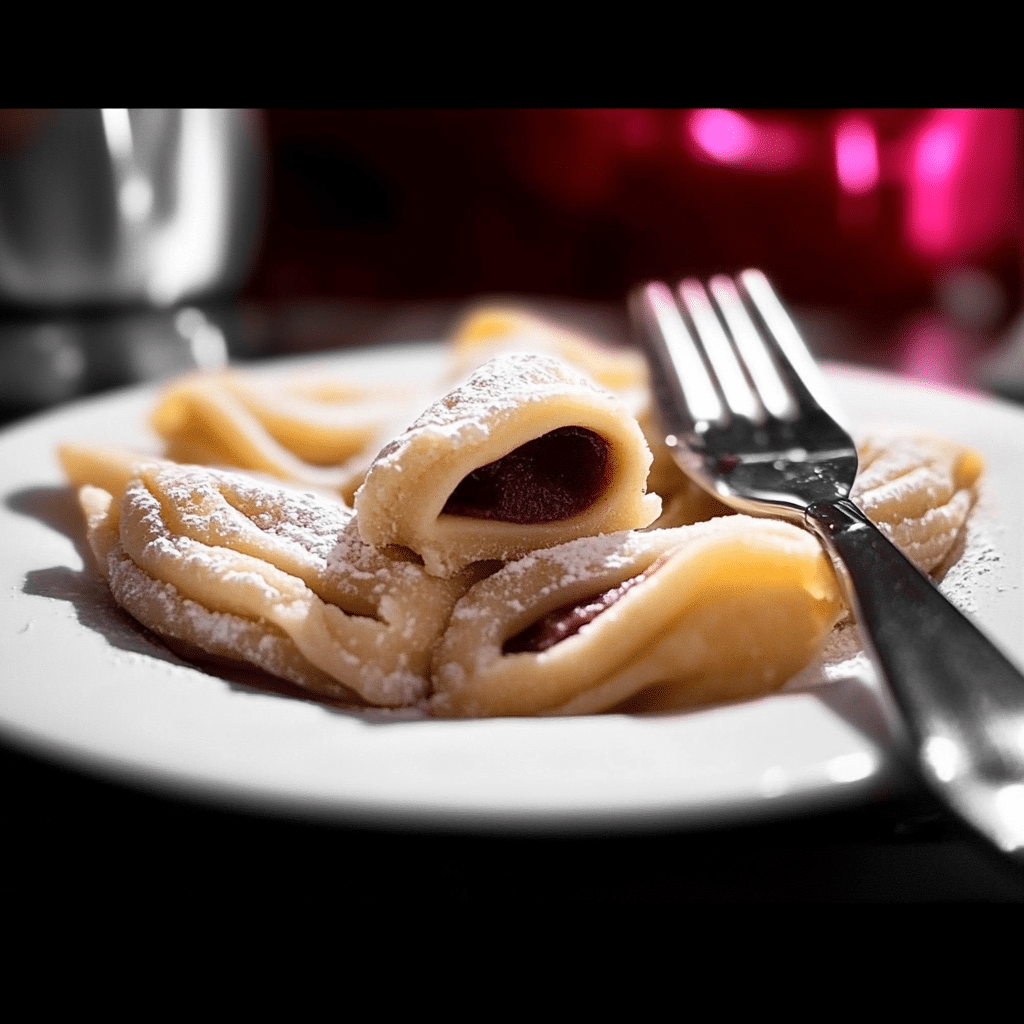
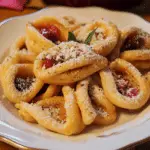
Pizzicati are a delightful Italian treat that combines the crispiness of a cookie with the richness of a classic shortbread-style dough, all wrapped around a sweet and tangy filling. These little bites, originating from Italy, are perfect for any occasion – whether you’re hosting a dinner party, having a cozy afternoon tea, or simply craving something sweet. Pizzicati offer a unique combination of textures: a buttery, tender pastry on the outside, and a flavorful filling that will delight your taste buds with every bite.
The traditional Pizzicati recipe can be adapted with various fillings, but the most common ones feature chocolate, fruit preserves, or a combination of both. Their versatility makes them a fantastic dessert to experiment with, and they are also simple enough for beginner bakers to prepare with success.
Whether you want to indulge in a rich and decadent treat or create a memorable homemade gift, Pizzicati are a fun and delicious choice. In this guide, we’ll explore the step-by-step process to make these authentic Italian treats from scratch, along with variations, tips, and suggestions for perfect results every time.
Perfect for:
- Holiday celebrations or family gatherings
- Afternoon tea or coffee
- Gift-giving (homemade gifts always make a special impact)
- Special occasions or just a cozy snack
Why You’ll Love Pizzicati
Here’s why Pizzicati will become your favorite new recipe:
- Irresistible Texture: The buttery, melt-in-your-mouth dough contrasts beautifully with the sweet filling, creating a delicious combination of crunchy and chewy textures.
- Versatile Fillings: You can use chocolate, jam, or fruit preserves, giving you endless flavor combinations. Plus, you can experiment with nuts or even flavored liqueurs for added depth.
- Easy to Make: With just a handful of ingredients, you can whip up a batch of these delightful cookies with minimal effort and time.
- Customizable: Make your Pizzicati with your favorite jam or even a sweetened ricotta filling for an Italian twist. You can adapt this recipe to suit your dietary preferences too, whether that means making them gluten-free, dairy-free, or vegan.
- Beautiful and Impressive: They have an elegant, refined appearance that’s sure to impress your guests, and their delicate flavors will have everyone asking for the recipe.
Preparation and Cooking Time
- Total Time: 1 hour 30 minutes
- Preparation Time: 20 minutes
- Cooking Time: 25-30 minutes
- Resting Time: 30 minutes (chilling the dough)
- Servings: 24-30 Pizzicati cookies
- Calories per serving: Approximately 120-150 calories (per cookie)
- Key Nutrients: Protein: 2g, Carbs: 18g, Fat: 7g
Ingredients
Here’s what you’ll need to make Pizzicati:
For Dough:
- 1 ½ cups all-purpose flour
- ½ cup unsalted butter, softened
- ½ cup powdered sugar
- 1 egg (room temperature)
- 1 teaspoon vanilla extract
- A pinch of salt
For the Filling:
- ½ cup fruit preserves or jam (apricot, raspberry, or strawberry work well)
- 2 ounces dark chocolate (optional)
- ¼ cup finely chopped nuts (e.g., walnuts or almonds) (optional)
The Glaze (optional):
- 1/2 cup powdered sugar
- 1 tablespoon milk (or water)
- 1 teaspoon lemon juice or vanilla extract (optional)
Ingredient Highlights
- Flour: All-purpose flour creates a soft and delicate dough for Pizzicati that is easy to work with.
- Butter: Unsalted butter contributes to the rich, melt-in-your-mouth texture of the cookie dough, making it incredibly tender.
- Powdered Sugar: Powdered sugar ensures a smooth dough and contributes to the soft, meltable texture of the cookies.
- Fruit Preserves: Fruit preserves or jam add a burst of sweet and tangy flavor that balances perfectly with the buttery dough.
- Dark Chocolate: Optional but recommended! Dark chocolate adds richness and depth, making it a great pairing with fruit or as a stand-alone filling.
- Nuts: Adding finely chopped nuts like almonds or walnuts gives a lovely crunch and an extra layer of flavor to the Pizzicati.
Step-by-Step Instructions
Follow these simple steps to make Pizzicati:
First Step: Prepare the Dough
- Mix the Dry Ingredients: In a medium-sized bowl, whisk together the flour and salt. Set aside.
- Cream the Butter and Sugar: In a large bowl, use an electric mixer or whisk to cream the softened butter and powdered sugar together until light and fluffy. This process should take about 2-3 minutes.
- Add the Egg and Vanilla: Add the egg and vanilla extract to the butter mixture. Beat until fully incorporated.
- Combine the Wet and Dry Ingredients: Gradually add the dry ingredients to the wet ingredients, mixing until the dough comes together. Be careful not to overmix. If the dough seems too sticky, add a little more flour; if it’s too dry, add a teaspoon of water or milk.
- Chill the Dough: Form the dough into a ball, cover it with plastic wrap, and refrigerate for at least 30 minutes. Chilling the dough will make it easier to roll out and help maintain its shape during baking.
Second Step: Prepare the Filling
- Choose Your Filling: You can use fruit preserves, jam, or melted chocolate as the filling for your Pizzicati. If using jam or preserves, ensure the fruit filling is not too runny to avoid making the dough soggy.
- Melt the Chocolate (Optional): If you’re adding chocolate, break it into small pieces and melt it in a heatproof bowl over a double boiler or in the microwave, stirring every 20 seconds to prevent burning. Allow it to cool slightly before using.
- Chop the Nuts (Optional): If you’re adding nuts to the filling, chop them finely and set aside.
Third Step: Shape the Pizzicati
- Preheat the Oven: Preheat your oven to 350°F (175°C) and line a baking sheet with parchment paper or a silicone baking mat.
- Roll Out the Dough: Once the dough has chilled, remove it from the refrigerator and roll it out on a lightly floured surface. Roll the dough to about 1/8-inch thickness.
- Cut the Dough: Using a round cookie cutter (about 2 inches in diameter), cut out circles from the dough. You can use a fluted cutter for a decorative edge or a simple round cutter for a clean, classic shape.
- Add the Filling: Place about a teaspoon of your chosen filling (jam, chocolate, or a mixture of both) in the center of each dough circle. Be careful not to overfill, as it could cause the cookies to break open during baking.
Fourth Step: Assemble the Pizzicati
- Seal the Cookies: Gently fold the edges of the dough over the filling, forming a half-moon shape or a small turnover. Press the edges together lightly to seal. You can also pinch the edges with a fork to create a decorative border.
- Bake the Pizzicati: Place the filled dough on the prepared baking sheet and bake for 12-15 minutes, or until the edges are golden and the cookies are firm to the touch. The baking time may vary depending on the size of your Pizzicati and your oven, so keep an eye on them toward the end.
- Cool: Once the cookies are done, allow them to cool on the baking sheet for a few minutes before transferring them to a wire rack to cool completely.
Fifth Step: Optional Glaze and Final Touches
- Prepare the Glaze (Optional): If you want to add a sweet glaze to your Pizzicati, whisk together the powdered sugar, milk, and lemon juice (or vanilla extract) until smooth. Drizzle the glaze over the cooled Pizzicati for a sweet, glossy finish.
- Serve: Once glazed, or left plain, the Pizzicati are ready to be served! Store them in an airtight container at room temperature for up to 3 days.
How to Serve Pizzicati
Pizzicati can be served in many different ways:
- With Tea or Coffee: These sweet treats pair beautifully with your favorite hot beverages, making them ideal for afternoon tea or coffee breaks.
- At a Party or Gathering: Serve Pizzicati as an elegant, bite-sized dessert at your next dinner party or family gathering. They’ll impress guests with their delicate appearance and delicious flavor.
- As a Gift: Wrap Pizzicati in a decorative box or jar and give them as a thoughtful homemade gift for birthdays, holidays, or special occasions.
- With Ice Cream or Whipped Cream: For an indulgent dessert, serve Pizzicati with a scoop of vanilla ice cream or a dollop of whipped cream.
Additional Tips for Pizzicati
Here are some tips to help you make the perfect Pizzicati:
- Chill the Dough: Chilling the dough before rolling it out helps keep the cookies from becoming too soft or sticky and helps them maintain their shape during baking.
- Don’t Overfill: Be careful not to overfill the dough circles with the jam or chocolate. A small spoonful is plenty, as too much filling can cause the dough to break open.
- Make Sure the Jam is Not Too Runny: If you’re using fruit preserves, be sure the jam is not too runny. Thicker jams and preserves work best to prevent leaks during baking.
- Experiment with Fillings: Don’t be afraid to experiment with different jams, fillings, or even cream cheese-based fillings for a unique twist on this classic Italian cookie.
Recipe Variations for Pizzicati
Here are 10 variations of Pizzicati you can try:
- Nutella Pizzicati: Swap the fruit preserves for Nutella for a rich, chocolatey filling.
- Lemon Pizzicati: Add lemon zest to the dough and use lemon curd as the filling for a refreshing citrus twist.
- Berry Pizzicati: Use fresh berries or a berry jam (like blueberry or blackberry) to create a fruity variation.
- Almond Pizzicati: Add almond paste or finely ground almonds to the dough for a nutty flavor and a smoother texture.
- Orange Marmalade Pizzicati: Try orange marmalade for a tangy, citrusy filling that pairs perfectly with the buttery dough.
- Apricot Pizzicati: Swap the filling with apricot preserves for a slightly tart, sweet flavor that complements the dough.
- Ricotta and Honey Pizzicati: Use a mixture of ricotta cheese and honey for a creamy and sweet filling.
- Chocolate-Mint Pizzicati: Add a few drops of mint extract to the chocolate filling for a refreshing mint chocolate flavor.
- Spiced Pizzicati: Add a pinch of cinnamon and nutmeg to the dough for a warm, spiced flavor, perfect for fall.
- Coconut Pizzicati: Incorporate shredded coconut into the filling for a tropical twist.
Freezing and Storage for Pizzicati
- Freezing: You can freeze the unbaked Pizzicati. Place them on a baking sheet in a single layer, freeze until solid, then transfer to a freezer-safe container or bag. When you’re ready to bake them, simply pop them straight into the oven from frozen, adding a couple of extra minutes to the baking time.
- Storage: Store baked Pizzicati in an airtight container at room temperature for up to 3 days. For longer storage, freeze them and thaw as needed.
Special Equipment for Pizzicati
Here are some special equipment items you might need to make Pizzicati:
- Rolling Pin: Essential for rolling the dough to the right thickness.
- Cookie Cutters: Use round or fluted cutters to shape the dough into circles.
- Baking Sheet: A baking sheet is needed to bake the Pizzicati in the oven.
- Wire Rack: A wire rack is great for cooling the Pizzicati after baking to prevent them from becoming soggy.
- Electric Mixer: An electric mixer makes it easier to cream the butter and sugar, though you can do it by hand if necessary.
FAQ Section for Pizzicati
- Can I use store-bought jam for the filling? Yes, store-bought jam works perfectly for Pizzicati. Just make sure it’s not too runny.
- Can I make these cookies gluten-free? Yes, you can substitute the all-purpose flour with a gluten-free flour blend.
- Can I freeze the dough? Yes, you can freeze the dough for up to 3 months. Just wrap it tightly in plastic wrap and store it in a freezer bag.
- Can I make these without an egg? Yes, you can substitute the egg with a flax egg or another egg replacer if you’re vegan or allergic to eggs.
- Can I use a different filling besides fruit preserves? Absolutely! You can use chocolate, cream cheese, or even a combination of different fillings like Nutella, jam, or nuts.
Pizzicati
- Total Time: 1 hour 20 minutes
Ingredients
For the Dough:
- 1 ½ cups all-purpose flour
- ½ cup unsalted butter, softened
- ½ cup powdered sugar
- 1 egg (room temperature)
- 1 teaspoon vanilla extract
- A pinch of salt
For the Filling:
- ½ cup fruit preserves or jam (apricot, raspberry, or strawberry work well)
- 2 ounces dark chocolate (optional)
- ¼ cup finely chopped nuts (e.g., walnuts or almonds) (optional)
For the Glaze (optional):
- 1/2 cup powdered sugar
- 1 tablespoon milk (or water)
- 1 teaspoon lemon juice or vanilla extract (optional)
Ingredient Highlights
- Flour: All-purpose flour creates a soft and delicate dough for Pizzicati that is easy to work with.
- Butter: Unsalted butter contributes to the rich, melt-in-your-mouth texture of the cookie dough, making it incredibly tender.
- Powdered Sugar: Powdered sugar ensures a smooth dough and contributes to the soft, meltable texture of the cookies.
- Fruit Preserves: Fruit preserves or jam add a burst of sweet and tangy flavor that balances perfectly with the buttery dough.
- Dark Chocolate: Optional but recommended! Dark chocolate adds richness and depth, making it a great pairing with fruit or as a stand-alone filling.
- Nuts: Adding finely chopped nuts like almonds or walnuts gives a lovely crunch and an extra layer of flavor to the Pizzicati.
Instructions
Step 1: Prepare the Dough
- Mix the Dry Ingredients: In a medium-sized bowl, whisk together the flour and salt. Set aside.
- Cream the Butter and Sugar: In a large bowl, use an electric mixer or whisk to cream the softened butter and powdered sugar together until light and fluffy. This process should take about 2-3 minutes.
- Add the Egg and Vanilla: Add the egg and vanilla extract to the butter mixture. Beat until fully incorporated.
- Combine the Wet and Dry Ingredients: Gradually add the dry ingredients to the wet ingredients, mixing until the dough comes together. Be careful not to overmix. If the dough seems too sticky, add a little more flour; if it’s too dry, add a teaspoon of water or milk.
- Chill the Dough: Form the dough into a ball, cover it with plastic wrap, and refrigerate for at least 30 minutes. Chilling the dough will make it easier to roll out and help maintain its shape during baking.
Step 2: Prepare the Filling
- Choose Your Filling: You can use fruit preserves, jam, or melted chocolate as the filling for your Pizzicati. If using jam or preserves, ensure the fruit filling is not too runny to avoid making the dough soggy.
- Melt the Chocolate (Optional): If you’re adding chocolate, break it into small pieces and melt it in a heatproof bowl over a double boiler or in the microwave, stirring every 20 seconds to prevent burning. Allow it to cool slightly before using.
- Chop the Nuts (Optional): If you’re adding nuts to the filling, chop them finely and set aside.
Step 3: Shape the Pizzicati
- Preheat the Oven: Preheat your oven to 350°F (175°C) and line a baking sheet with parchment paper or a silicone baking mat.
- Roll Out the Dough: Once the dough has chilled, remove it from the refrigerator and roll it out on a lightly floured surface. Roll the dough to about 1/8-inch thickness.
- Cut the Dough: Using a round cookie cutter (about 2 inches in diameter), cut out circles from the dough. You can use a fluted cutter for a decorative edge or a simple round cutter for a clean, classic shape.
- Add the Filling: Place about a teaspoon of your chosen filling (jam, chocolate, or a mixture of both) in the center of each dough circle. Be careful not to overfill, as it could cause the cookies to break open during baking.
Step 4: Assemble the Pizzicati
- Seal the Cookies: Gently fold the edges of the dough over the filling, forming a half-moon shape or a small turnover. Press the edges together lightly to seal. You can also pinch the edges with a fork to create a decorative border.
- Bake the Pizzicati: Place the filled dough on the prepared baking sheet and bake for 12-15 minutes, or until the edges are golden and the cookies are firm to the touch. The baking time may vary depending on the size of your Pizzicati and your oven, so keep an eye on them toward the end.
- Cool: Once the cookies are done, allow them to cool on the baking sheet for a few minutes before transferring them to a wire rack to cool completely.
Step 5: Optional Glaze and Final Touches
- Prepare the Glaze (Optional): If you want to add a sweet glaze to your Pizzicati, whisk together the powdered sugar, milk, and lemon juice (or vanilla extract) until smooth. Drizzle the glaze over the cooled Pizzicati for a sweet, glossy finish.
- Serve: Once glazed, or left plain, the Pizzicati are ready to be served! Store them in an airtight container at room temperature for up to 3 days.
- Prep Time: 20 minutes
- Cooling: 30 minutes
- Cook Time: 30 minutes
Nutrition
- Serving Size: 24-30 pieces
- Calories: 120-150
- Fat: 7g
- Carbohydrates: 18g
- Protein: 2g
Conclusion of Pizzicati
Pizzicati are a delightful Italian treat that will impress anyone who tries them. Whether you choose to stick to the traditional fruit jam filling or get creative with other flavor combinations, these cookies offer a delicious bite of Italy that can be enjoyed on any occasion. With their irresistible texture and versatility, Pizzicati are a must-try for anyone looking to bring a little taste of Italy into their kitchen. Happy baking!