
Introduction
If you’re craving something sweet, quick, and incredibly easy to make, look no further than a peanut butter mug cake. This single-serving dessert is a delightful treat that combines the rich, creamy taste of peanut butter with the softness of cake in a perfectly portioned, microwave-friendly format. Ready in just a few minutes, it’s ideal for when you need a quick fix for your sweet tooth or a personal indulgence after a long day.
This article will guide you through why peanut butter mug cakes are so irresistible, provide detailed instructions on how to make them, and offer tips for customizing your mug cake to suit your preferences. Whether you’re a peanut butter lover or just looking for a convenient dessert to satisfy your cravings, a peanut butter mug cake is the perfect solution.
Why You’ll Love This Recipe
- Quick and Easy: Peanut butter mug cakes can be prepared in just a few minutes using basic ingredients you likely already have in your pantry. No need to spend hours in the kitchen—this dessert is perfect for a last-minute treat.
- Individual Servings: The beauty of mug cakes lies in their single-serving size. You get a fresh, warm dessert without worrying about leftovers or sharing—unless you want to!
- Rich and Decadent: With the addition of peanut butter, this cake offers a rich, nutty flavor that perfectly complements the sweetness of the cake. The texture is moist and soft, offering the ideal comfort dessert.
- Customizable: You can easily modify this mug cake to suit your taste. Whether you like extra peanut butter, chocolate chips, or a pinch of cinnamon for spice, the possibilities are endless.
- Satisfies Sweet Cravings: When you’re looking for something sweet and comforting but don’t want to commit to baking an entire cake, this is the ideal solution. It’s quick, satisfying, and utterly delicious.
Preparation Time and Servings
- Total Time: 5 minutes (1 minute for prep, 1-2 minutes for microwaving, optional cooling)
- Servings: 1 mug cake (single serving)
- Nutrition Facts (per serving):
- Calories: 350
- Protein: 9g
- Carbs: 40g
- Fat: 20g
Ingredients
- 4 tablespoons peanut butter (creamy or chunky depending on your preference)
- 1 tablespoon sugar (can use granulated sugar or a sugar substitute like Stevia or monk fruit for a lower-calorie version)
- 3 tablespoons milk (dairy or plant-based like almond, soy, or oat milk)
- 1 large egg
- 1/4 teaspoon vanilla extract
- 4 tablespoons all-purpose flour (or gluten-free flour if preferred)
- 1/8 teaspoon baking powder
- Pinch of salt
- Optional mix-ins: chocolate chips, chopped peanuts, a drizzle of honey, or a dash of cinnamon
Step-by-Step Preparation
FIRST STEP: PREPARE THE MUG
- Select Your Mug: Choose a microwave-safe mug that holds at least 8 ounces of liquid. A smaller mug may cause the batter to overflow during microwaving. Ensure the mug is large enough to allow the cake to rise slightly while cooking.
- Grease the Mug: While it’s not strictly necessary, lightly greasing the inside of the mug with a bit of butter or oil will make it easier to remove the cake later.
SECOND STEP: COMBINE THE WET INGREDIENTS
- Mix Peanut Butter and Sugar: In your mug, add the peanut butter and sugar. Use a fork or spoon to mix these ingredients together. If the peanut butter is too thick or sticky, feel free to warm it up in the microwave for a few seconds to make it easier to stir.
- Add Milk and Egg: Next, add the milk and the egg to the mug. Stir the mixture thoroughly until the peanut butter and sugar are fully incorporated into the liquid ingredients. You want the batter to be smooth and creamy without any lumps.
- Add Vanilla Extract: To enhance the flavor, add a small splash of vanilla extract. Stir again to combine.
THIRD STEP: ADD DRY INGREDIENTS
- Add Flour: Add the flour into the mug, stirring gently to combine. Make sure the flour is fully incorporated into the wet ingredients to avoid clumps. This will form the base of your cake.
- Baking Powder and Salt: Sprinkle in the baking powder and a pinch of salt. The baking powder helps the cake rise and become fluffy, while the salt balances the sweetness of the sugar.
- Stir Well: Use your spoon to mix everything together, ensuring that there are no dry flour pockets left in the batter.
FOURTH STEP: MICROWAVE THE CAKE
- Microwave the Cake: Place the mug in the microwave and cook on high for 1 minute and 30 seconds to 2 minutes. The cooking time may vary depending on your microwave’s wattage. Start with 1 minute and check the cake; it should have risen and set, but still be slightly moist in the center.
- Test for Doneness: After microwaving, check the cake by gently pressing the center with a toothpick or fork. If it comes out clean, your cake is done. If not, continue to microwave in 15-20 second increments until fully cooked.
- Cool Slightly: Let the cake cool for a minute or two, as it will be very hot immediately after microwaving.
FINAL STEP: GARNISH AND SERVE
- Optional Garnishes: Once the cake is cooked, you can drizzle it with more peanut butter, honey, or even chocolate syrup for extra flavor. Sprinkle some chopped peanuts or chocolate chips on top for an added crunch and a burst of flavor.
- Serve and Enjoy: Grab a spoon, dig in, and enjoy the warm, comforting goodness of your peanut butter mug cake. Pair it with a cup of coffee, tea, or a scoop of ice cream for the ultimate indulgence.

How to Serve Peanut Butter Mug Cake
Peanut butter mug cakes are incredibly versatile when it comes to serving ideas. Here are a few options to elevate your dessert experience:
1. Pair with Ice Cream
The warm, rich texture of the peanut butter mug cake pairs wonderfully with a scoop of vanilla or chocolate ice cream. The contrast of hot and cold makes for an irresistible combination.
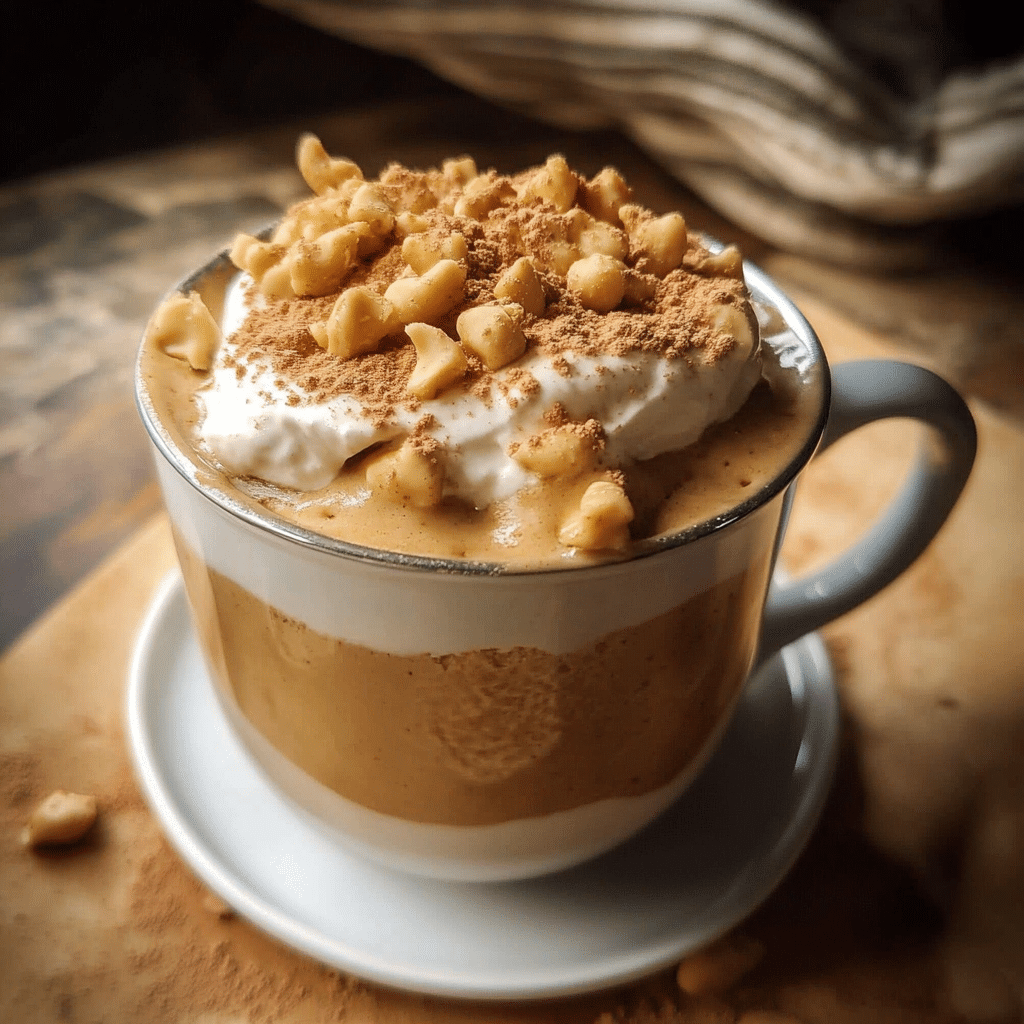
2. Top with Whipped Cream
For a lighter touch, top your mug cake with a dollop of freshly whipped cream. You can also add a sprinkle of cocoa powder or a drizzle of caramel sauce for an added layer of sweetness.
3. Serve with Fresh Fruit
To balance the richness of the peanut butter cake, serve it with fresh fruit like sliced bananas, berries, or even a few apple slices. The fruity freshness cuts through the sweetness and adds a refreshing element to your dessert.
4. Peanut Butter and Jelly
If you’re feeling nostalgic, take the classic PB&J to the next level by serving your mug cake with a smear of your favorite jelly or jam. This adds an extra layer of sweetness and a burst of flavor to complement the peanut butter.
5. Add a Chocolate Drizzle
For an extra touch of indulgence, drizzle melted chocolate or peanut butter chocolate sauce over your mug cake. The combination of chocolate and peanut butter is always a crowd-pleaser.
Additional Tips for Perfect Peanut Butter Mug Cake
- Adjust Sweetness: Depending on your taste preferences, you can adjust the sweetness of the mug cake. If you like a sweeter dessert, add more sugar. Alternatively, if you prefer a less sweet cake, cut down on the sugar or use a sugar substitute.
- Use Different Nut Butters: While peanut butter is the classic choice for this recipe, you can experiment with other nut butters like almond butter or cashew butter for a different flavor. Keep in mind that different nut butters may slightly alter the texture or taste of the cake.
- Make it Gluten-Free: For a gluten-free version, simply swap out the all-purpose flour for a gluten-free flour blend or almond flour. Ensure that your baking powder is also gluten-free.
- Microwave Tips: Microwave ovens vary in power, so be sure to adjust the cooking time accordingly. Start with the recommended time, but check the cake every 20 seconds if necessary.
- Adding Mix-ins: Feel free to add chocolate chips, chopped peanuts, or even a swirl of Nutella to the batter for extra flavor. Just be sure to stir gently so that your mix-ins are evenly distributed.
- Vegan Version: To make the recipe vegan, use a flax egg (1 tablespoon ground flaxseed mixed with 2.5 tablespoons water) in place of the egg. Substitute the milk for any plant-based variety and ensure your peanut butter is free from dairy.
Recipe Variations
While the classic peanut butter mug cake is delicious on its own, you can easily modify the recipe to suit your tastes:
1. Chocolate Peanut Butter Mug Cake
Add 1-2 tablespoons of cocoa powder to the dry ingredients to create a rich, chocolatey version of the peanut butter mug cake. For an even richer treat, add chocolate chips to the batter and top with melted chocolate sauce.
2. Peanut Butter Banana Mug Cake
Mash a small ripe banana and stir it into the batter for a delicious peanut butter and banana combination. The banana adds moisture and a hint of natural sweetness, elevating the flavor profile of the cake.
3. Peanut Butter Oat Mug Cake
For a more hearty and filling dessert, substitute some of the flour with rolled oats. This will create a slightly chewy texture and give the cake a wholesome, nutty flavor.
4. Peanut Butter S’mores Mug Cake
Add a layer of mini marshmallows and a few graham cracker crumbs on top of the batter before microwaving for a s’mores-inspired mug cake. After microwaving, toast the marshmallows in the microwave for a golden, gooey finish.
Freezing and Storage
Peanut butter mug cakes are meant to be enjoyed fresh out of the microwave, but if you’d like to prepare one in advance or store leftovers, here are some tips:
- Make-Ahead Option: You can prepare the dry ingredients in advance and store them in a sealed bag or container. When ready to make the mug cake, simply add the wet ingredients and microwave as directed.
- Storing Leftovers: If you have leftover cake, store it in the fridge for up to 1-2 days. To reheat, simply microwave the cake for 15-30 seconds.
- Freezing: While mug cakes are best enjoyed immediately, you can freeze the batter (before microwaving) in a sealed container or freezer-safe mug for up to 3 months. When ready to enjoy, microwave the frozen batter for an additional 1-2 minutes.

Peanut Butter Mug Cake: A Quick and Delicious Dessert for Any Time
- Total Time: 0 hours
Ingredients
- 4 tablespoons peanut butter (creamy or chunky depending on your preference)
- 1 tablespoon sugar (can use granulated sugar or a sugar substitute like Stevia or monk fruit for a lower-calorie version)
- 3 tablespoons milk (dairy or plant-based like almond, soy, or oat milk)
- 1 large egg
- 1/4 teaspoon vanilla extract
- 4 tablespoons all-purpose flour (or gluten-free flour if preferred)
- 1/8 teaspoon baking powder
- Pinch of salt
- Optional mix-ins: chocolate chips, chopped peanuts, a drizzle of honey, or a dash of cinnamon
Instructions
FIRST STEP: PREPARE THE MUG
- Select Your Mug: Choose a microwave-safe mug that holds at least 8 ounces of liquid. A smaller mug may cause the batter to overflow during microwaving. Ensure the mug is large enough to allow the cake to rise slightly while cooking.
- Grease the Mug: While it’s not strictly necessary, lightly greasing the inside of the mug with a bit of butter or oil will make it easier to remove the cake later.
SECOND STEP: COMBINE THE WET INGREDIENTS
- Mix Peanut Butter and Sugar: In your mug, add the peanut butter and sugar. Use a fork or spoon to mix these ingredients together. If the peanut butter is too thick or sticky, feel free to warm it up in the microwave for a few seconds to make it easier to stir.
- Add Milk and Egg: Next, add the milk and the egg to the mug. Stir the mixture thoroughly until the peanut butter and sugar are fully incorporated into the liquid ingredients. You want the batter to be smooth and creamy without any lumps.
- Add Vanilla Extract: To enhance the flavor, add a small splash of vanilla extract. Stir again to combine.
THIRD STEP: ADD DRY INGREDIENTS
- Add Flour: Add the flour into the mug, stirring gently to combine. Make sure the flour is fully incorporated into the wet ingredients to avoid clumps. This will form the base of your cake.
- Baking Powder and Salt: Sprinkle in the baking powder and a pinch of salt. The baking powder helps the cake rise and become fluffy, while the salt balances the sweetness of the sugar.
- Stir Well: Use your spoon to mix everything together, ensuring that there are no dry flour pockets left in the batter.
FOURTH STEP: MICROWAVE THE CAKE
- Microwave the Cake: Place the mug in the microwave and cook on high for 1 minute and 30 seconds to 2 minutes. The cooking time may vary depending on your microwave’s wattage. Start with 1 minute and check the cake; it should have risen and set, but still be slightly moist in the center.
- Test for Doneness: After microwaving, check the cake by gently pressing the center with a toothpick or fork. If it comes out clean, your cake is done. If not, continue to microwave in 15-20 second increments until fully cooked.
- Cool Slightly: Let the cake cool for a minute or two, as it will be very hot immediately after microwaving.
FINAL STEP: GARNISH AND SERVE
- Optional Garnishes: Once the cake is cooked, you can drizzle it with more peanut butter, honey, or even chocolate syrup for extra flavor. Sprinkle some chopped peanuts or chocolate chips on top for an added crunch and a burst of flavor.
- Serve and Enjoy: Grab a spoon, dig in, and enjoy the warm, comforting goodness of your peanut butter mug cake. Pair it with a cup of coffee, tea, or a scoop of ice cream for the ultimate indulgence.
- Prep Time: 1 minute
- Microwaving: 1-2minutes
Nutrition
- Serving Size: 1
- Calories: 350
- Fat: 20g
- Carbohydrates: 40g
- Protein: 9g
Conclusion
A peanut butter mug cake is the perfect dessert for anyone craving something sweet, quick, and easy to make. With its rich flavor, soft texture, and endless customization possibilities, it’s a treat you’ll want to make again and again. Whether you’re making it for yourself after a long day or surprising a friend with a sweet treat, this mug cake is a guaranteed hit. Try it today and experience the joy of a warm, gooey, peanut butter dessert in just minutes!