
Introduction
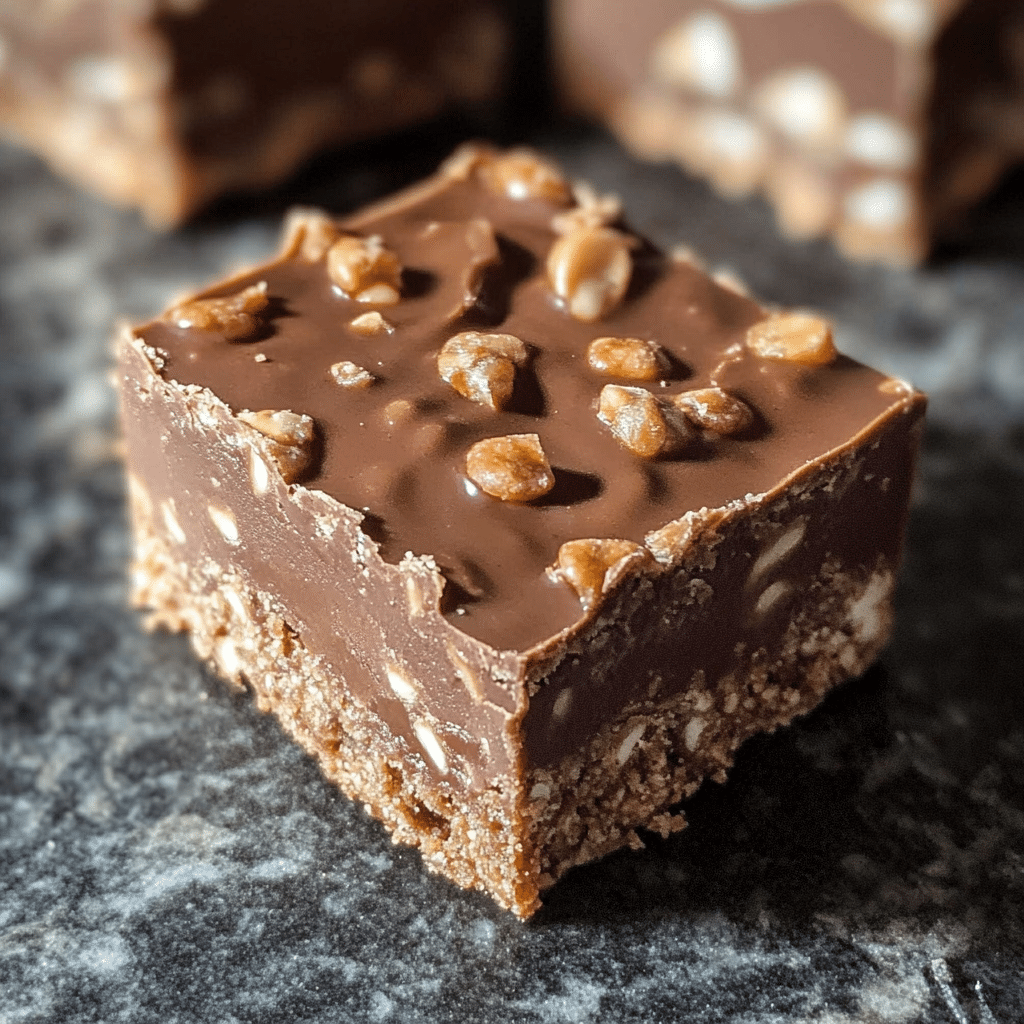
If you’ve ever craved the sweet crunchiness of a chocolate-covered crispy rice bar, you’re not alone! Crunch bars are a beloved treat that combines creamy chocolate with the irresistible crunch of crispy rice. But what if you could make this delicious snack at home? With just a few simple ingredients, you can create your very own homemade crunch bars that are just as tasty—if not more so—than the ones you find in the store.
In this article, we’ll show you how to make homemade crunch bars from scratch. We’ll explore why these treats are so popular, provide a step-by-step guide on how to make them, and share tips for customizing the recipe to suit your tastes. Whether you’re making them for a special occasion, a snack to share with friends and family, or just a treat for yourself, homemade crunch bars are sure to satisfy your sweet tooth.
Why You’ll Love This Recipe
- Quick and Easy: Making homemade crunch bars is simple and quick, requiring only a few ingredients and minimal effort.
- Customizable: You can easily modify the recipe to suit your dietary preferences or taste preferences. Add nuts, seeds, or dried fruit to make the bars even more delicious!
- Perfect for Sharing: Homemade crunch bars are ideal for parties, picnics, or just when you want to impress your friends and family with a tasty homemade treat.
- No Baking Required: Unlike many desserts, these bars don’t require any baking—just melt, mix, and chill!
- Sweet and Crunchy: The combination of rich chocolate and crispy rice provides the perfect balance of sweetness and crunch.
Preparation Time and Servings
- Total Time: 2 hours (20 minutes for prep, 1 hour for setting)
- Servings: This recipe makes about 12 servings, depending on how large you cut the pieces.
- Nutrition Facts (per serving): Calories: 210, Protein: 2g, Carbs: 30g, Fat: 11g.
Ingredients
- For the Crunch Bars:
- 4 cups crispy rice cereal: This is the star of the crunch bar, giving it that signature crisp texture. You can use any brand you like.
- 1 cup milk chocolate chips: For the classic chocolate flavor. You can substitute with dark or white chocolate if preferred.
- ½ cup creamy peanut butter: Adds richness and a hint of nuttiness. You can substitute with almond butter or any other nut butter of your choice.
- 2 tablespoons unsalted butter: For extra creaminess and to help bind the ingredients together.
- 2 tablespoons honey or corn syrup: Adds sweetness and helps keep the bars from being too dry.
- 1 teaspoon vanilla extract: For a touch of vanilla flavor to complement the chocolate and peanut butter.
- Optional Add-ins:
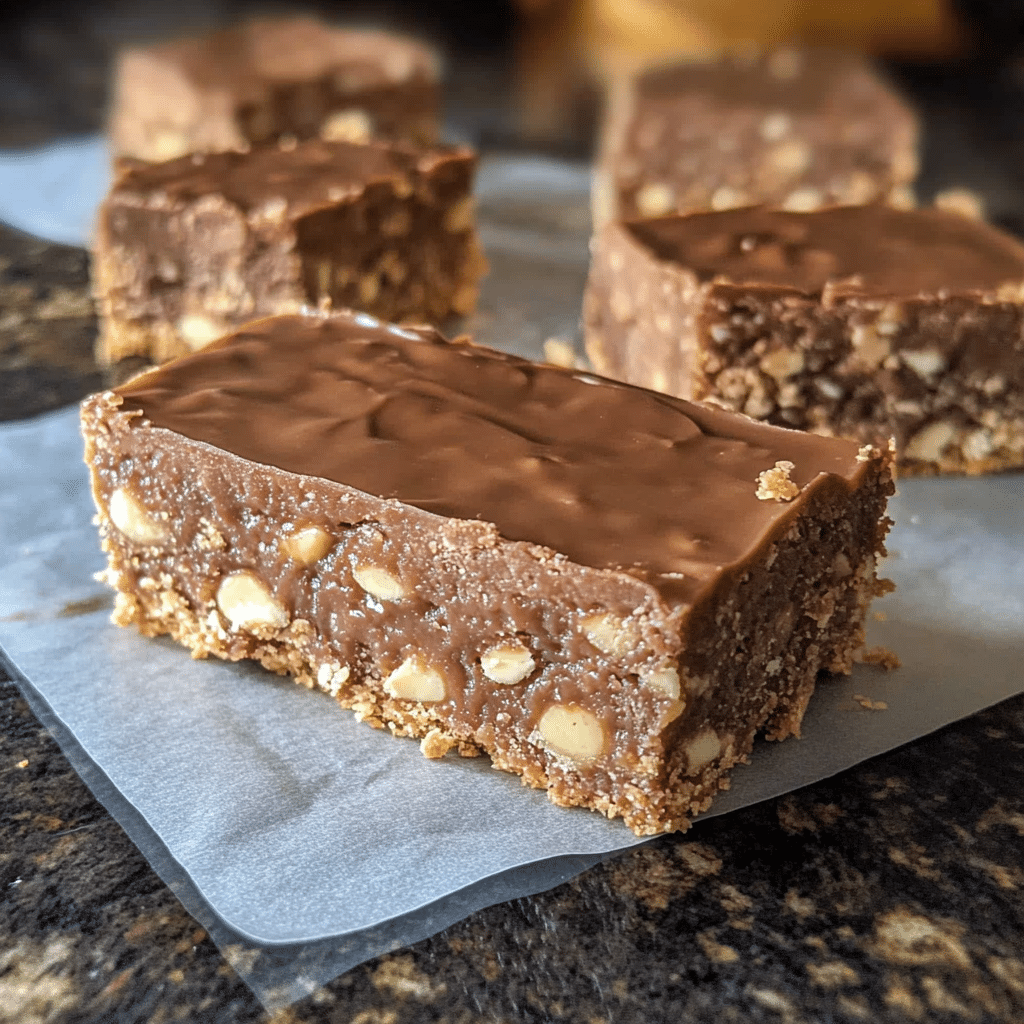
- ½ cup chopped nuts (such as peanuts, almonds, or cashews): For added crunch and flavor.
- ¼ cup mini marshmallows: For a gooey, extra sweet texture.
- ¼ cup dried fruit (raisins, cranberries, or cherries): For a fruity twist.
- A pinch of sea salt: To enhance the sweetness of the chocolate and balance the flavors.
Step-by-Step Preparation
First Step: Prepare the Pan and Cereal
- Line the Pan: Start by preparing a 9×9-inch square baking pan (or a similar-sized pan) by lining it with parchment paper. This will prevent the bars from sticking to the pan and make them easier to remove after they set.
- Add the Cereal: Pour the crispy rice cereal into a large mixing bowl. Set it aside while you prepare the chocolate mixture.
Second Step: Melt the Chocolate Mixture
- Melt the Butter and Peanut Butter: In a medium saucepan, melt the unsalted butter and peanut butter together over low heat. Stir constantly to ensure they melt evenly without burning.
- Add the Chocolate Chips: Once the butter and peanut butter are melted and smooth, add the milk chocolate chips to the mixture. Stir until the chocolate chips are completely melted and the mixture becomes smooth and creamy. Be sure to keep the heat low to prevent the chocolate from burning.
- Add Sweetener and Vanilla: Stir in the honey or corn syrup, followed by the vanilla extract. This will add sweetness and a rich flavor to your crunch bars. Continue stirring until everything is well combined.
Third Step: Combine the Cereal and Chocolate Mixture
- Pour Chocolate Mixture Over Cereal: Once the chocolate mixture is smooth and ready, pour it over the crispy rice cereal. Use a spatula or wooden spoon to gently fold the cereal into the chocolate mixture. Be careful not to crush the cereal, as you want to maintain the crispy texture.
- Add Optional Add-ins: If you’re using any optional add-ins like nuts, marshmallows, or dried fruit, fold them in now. This is the perfect time to customize your bars with extra crunch or sweetness.
Fourth Step: Press the Mixture into the Pan
- Transfer to Pan: Once the cereal is fully coated with the chocolate mixture, transfer it into the prepared baking pan. Use the back of a spoon or a flat spatula to press the mixture down firmly into an even layer. This helps ensure that the bars hold together well once they set.
- Smooth the Top: Smooth the top of the mixture to make it as even as possible. If you prefer a thicker bar, you can use a smaller pan, but keep in mind that it may take longer to set.
Fifth Step: Let the Bars Set
- Chill the Bars: Place the pan in the refrigerator and let the crunch bars set for at least 1 hour. You want the bars to be firm and solid before cutting into them.
- Check for Firmness: After an hour, check the bars by gently pressing on the top. If they feel firm and solid, they’re ready to be cut. If they’re still soft, return them to the fridge for an additional 30 minutes.
Final Step: Cut and Serve
- Cut into Bars: Once the bars are firm, use a sharp knife to cut them into squares or rectangles, depending on your preference. You can also cut them into smaller pieces for bite-sized treats.
- Serve and Enjoy: Serve the homemade crunch bars immediately, or store them in an airtight container at room temperature for up to a week. If you want them to stay firm longer, you can store them in the refrigerator.
How to Serve Homemade Crunch Bars
Homemade crunch bars are a versatile treat that can be served in many different ways. Here are some ideas for how to serve them:
1. As a Snack
Crunch bars are perfect for an afternoon snack when you’re craving something sweet. They’re portable and easy to pack, making them ideal for lunches, picnics, or road trips.
2. For Parties and Gatherings
If you’re hosting a party or a family gathering, these bars make an excellent addition to your dessert table. They’re simple to make in large batches and are sure to be a crowd-pleaser.
3. Serve with Ice Cream
For a special treat, serve homemade crunch bars with a scoop of your favorite ice cream. The combination of creamy ice cream and crispy, chocolatey bars is irresistible.
4. Gift Them to Loved Ones
Homemade crunch bars make great gifts! Wrap them in cellophane or place them in a decorative tin for a thoughtful and delicious homemade gift. Perfect for holidays or birthdays!
5. Pair with Milk or Coffee
These bars pair wonderfully with a glass of milk or a cup of coffee. The chocolate and peanut butter combination makes them a great companion to your favorite hot or cold drink.
Additional Tips for Perfect Crunch Bars
- Use High-Quality Chocolate: The chocolate is one of the key ingredients in this recipe, so choose a high-quality milk or dark chocolate for the best flavor.
- Don’t Overheat the Chocolate: Be careful not to overheat the chocolate mixture. Melt it slowly over low heat to avoid burning, as chocolate can burn easily.
- Press Firmly: Be sure to press the mixture firmly into the pan to ensure that the bars hold together. If they’re too loose, they may fall apart when you cut them.
- Experiment with Add-ins: Feel free to experiment with different add-ins, such as chopped pretzels, toffee bits, or shredded coconut. The possibilities are endless!
Recipe Variations
Homemade crunch bars are very customizable, so you can adjust the recipe to suit your taste preferences. Here are some variations to try:
1. Add Nuts
If you love nuts, consider adding chopped peanuts, almonds, or cashews to the mixture. Nuts add extra crunch and a savory contrast to the sweetness of the chocolate.
2. Use Different Types of Chocolate
While milk chocolate is the classic choice, you can swap it for dark chocolate for a more intense flavor or white chocolate for a sweeter, creamier taste.
3. Make It Vegan
To make this recipe vegan, swap the butter for a plant-based alternative and use dairy-free chocolate chips and peanut butter.
4. Add Dried Fruit
Dried cranberries, raisins, or cherries can add a chewy sweetness to the bars. They pair well with the chocolate and add a fruity twist to the classic crunch bars.
5. Use Rice Crisps Instead of Cereal
If you want a finer crunch, consider using rice crisps instead of crispy rice cereal. They’ll give your bars a lighter, airier texture.
Freezing and Storage
Homemade crunch bars can be stored for several days, making them great for meal prep or for having on hand when you need a sweet snack.
- Room Temperature: Store them in an airtight container at room temperature for up to a week.
- Refrigeration: If you prefer a firmer texture, store the bars in the fridge for up to 2 weeks.
- Freezing: To store crunch bars for an extended period, wrap them in plastic wrap and foil, then freeze for up to 3 months. Thaw in the refrigerator before serving.
Special Equipment
You don’t need many special tools to make homemade crunch bars, but a few kitchen essentials can make the process easier:
- Saucepan: A medium-sized saucepan is perfect for melting the chocolate and peanut butter.
- Mixing Bowl: A large mixing bowl to combine the cereal and chocolate mixture.
- Spatula or Spoon: Use a spatula to mix the ingredients and press the mixture into the pan.
- Baking Pan: A 9×9-inch square pan works perfectly for this recipe.
Frequently Asked Questions
1. Can I use a different type of cereal?
Yes, you can substitute the crispy rice cereal with other types of cereal like cornflakes, puffed rice, or even granola for a different texture.
2. Can I make these bars without peanut butter?
Yes! If you prefer to avoid peanut butter, you can use any other nut butter, such as almond butter or cashew butter, or even sunflower seed butter for a nut-free option.
3. Can I make these bars ahead of time?
Absolutely! You can make the bars ahead of time and store them in an airtight container for up to a week. They’re perfect for meal prep or making in advance for parties or gatherings.
4. Can I freeze the crunch bars?
Yes, you can freeze the bars for up to 3 months. Just wrap them tightly in plastic wrap and foil, and then place them in a freezer-safe bag. Thaw them in the refrigerator before serving.
Print
Homemade Crunch Bars
- Total Time: 1 hour 20 minutes
Ingredients
- For the Crunch Bars:
- 4 cups crispy rice cereal: This is the star of the crunch bar, giving it that signature crisp texture. You can use any brand you like.
- 1 cup milk chocolate chips: For the classic chocolate flavor. You can substitute with dark or white chocolate if preferred.
- ½ cup creamy peanut butter: Adds richness and a hint of nuttiness. You can substitute with almond butter or any other nut butter of your choice.
- 2 tablespoons unsalted butter: For extra creaminess and to help bind the ingredients together.
- 2 tablespoons honey or corn syrup: Adds sweetness and helps keep the bars from being too dry.
- 1 teaspoon vanilla extract: For a touch of vanilla flavor to complement the chocolate and peanut butter.
- Optional Add-ins:
- ½ cup chopped nuts (such as peanuts, almonds, or cashews): For added crunch and flavor.
- ¼ cup mini marshmallows: For a gooey, extra sweet texture.
- ¼ cup dried fruit (raisins, cranberries, or cherries): For a fruity twist.
- A pinch of sea salt: To enhance the sweetness of the chocolate and balance the flavors.
Instructions
First Step: Prepare the Pan and Cereal
- Line the Pan: Start by preparing a 9×9-inch square baking pan (or a similar-sized pan) by lining it with parchment paper. This will prevent the bars from sticking to the pan and make them easier to remove after they set.
- Add the Cereal: Pour the crispy rice cereal into a large mixing bowl. Set it aside while you prepare the chocolate mixture.
Second Step: Melt the Chocolate Mixture
- Melt the Butter and Peanut Butter: In a medium saucepan, melt the unsalted butter and peanut butter together over low heat. Stir constantly to ensure they melt evenly without burning.
- Add the Chocolate Chips: Once the butter and peanut butter are melted and smooth, add the milk chocolate chips to the mixture. Stir until the chocolate chips are completely melted and the mixture becomes smooth and creamy. Be sure to keep the heat low to prevent the chocolate from burning.
- Add Sweetener and Vanilla: Stir in the honey or corn syrup, followed by the vanilla extract. This will add sweetness and a rich flavor to your crunch bars. Continue stirring until everything is well combined.
Third Step: Combine the Cereal and Chocolate Mixture
- Pour Chocolate Mixture Over Cereal: Once the chocolate mixture is smooth and ready, pour it over the crispy rice cereal. Use a spatula or wooden spoon to gently fold the cereal into the chocolate mixture. Be careful not to crush the cereal, as you want to maintain the crispy texture.
- Add Optional Add-ins: If you’re using any optional add-ins like nuts, marshmallows, or dried fruit, fold them in now. This is the perfect time to customize your bars with extra crunch or sweetness.
Fourth Step: Press the Mixture into the Pan
- Transfer to Pan: Once the cereal is fully coated with the chocolate mixture, transfer it into the prepared baking pan. Use the back of a spoon or a flat spatula to press the mixture down firmly into an even layer. This helps ensure that the bars hold together well once they set.
- Smooth the Top: Smooth the top of the mixture to make it as even as possible. If you prefer a thicker bar, you can use a smaller pan, but keep in mind that it may take longer to set.
Fifth Step: Let the Bars Set
- Chill the Bars: Place the pan in the refrigerator and let the crunch bars set for at least 1 hour. You want the bars to be firm and solid before cutting into them.
- Check for Firmness: After an hour, check the bars by gently pressing on the top. If they feel firm and solid, they’re ready to be cut. If they’re still soft, return them to the fridge for an additional 30 minutes.
Final Step: Cut and Serve
- Cut into Bars: Once the bars are firm, use a sharp knife to cut them into squares or rectangles, depending on your preference. You can also cut them into smaller pieces for bite-sized treats.
- Serve and Enjoy: Serve the homemade crunch bars immediately, or store them in an airtight container at room temperature for up to a week. If you want them to stay firm longer, you can store them in the refrigerator.
- Prep Time: 20 minutes
- Setting: 1 hour
Nutrition
- Serving Size: 12
- Calories: 210
- Fat: 11g
- Carbohydrates: 30g
- Protein: 2g
Conclusion
Homemade crunch bars are the perfect combination of sweetness and crunch, and making them at home is incredibly easy. With just a few simple ingredients and minimal effort, you can create a delicious treat that everyone will love. Whether you’re making them for a special occasion or just as a quick snack, these homemade crunch bars are sure to satisfy your cravings. Try making them today and enjoy the perfect balance of chocolate, peanut butter, and crispy rice!