

Introduction
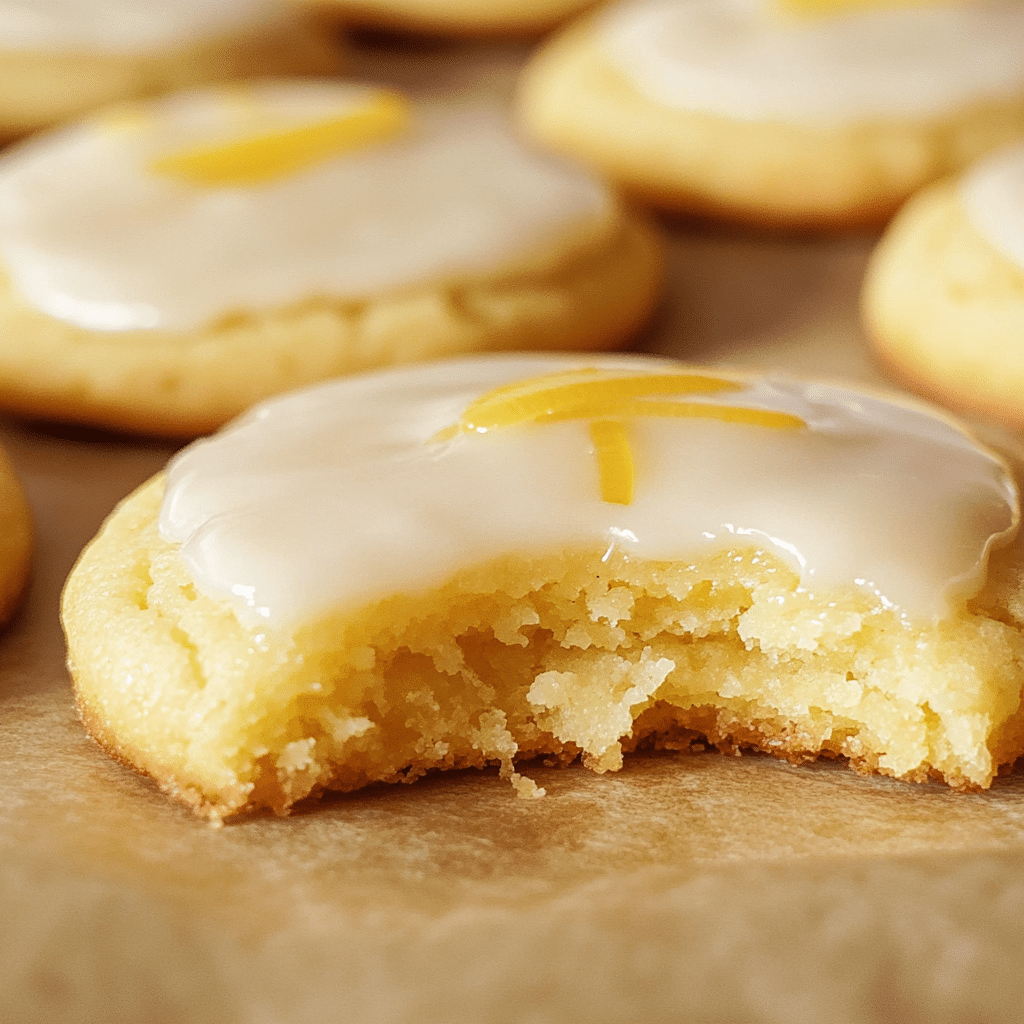
Lemon cookies have always been a popular treat, combining the tangy brightness of citrus with the soft, melt-in-your-mouth texture of a perfectly baked cookie. Glazed lemon cookies, however, take the beloved lemon flavor to the next level. The addition of a sweet, glossy glaze over the zesty lemon cookies creates a harmonious balance of tart and sweet, giving you a dessert that’s both refreshing and indulgent. Whether you’re baking for a special occasion, a family gathering, or simply because you’re craving something light yet delicious, these glazed lemon cookies are sure to be a crowd-pleaser.
Perfect for:
- Afternoon tea or coffee breaks
- Spring and summer gatherings
- Gift-giving for birthdays or holidays
- Dessert for family dinners
- Anyone who loves the zing of citrus desserts
Why You’ll Love This Recipe
Here’s why glazed lemon cookies will quickly become your go-to lemon dessert recipe:
- Bright and Zesty Flavor: The combination of lemon zest and fresh lemon juice gives these cookies a naturally bright, tangy flavor that feels refreshing and light.
- Soft and Chewy Texture: These cookies have a perfect chewy texture that’s not too soft and not too firm, making them a perfect bite every time.
- Sweet, Shiny Glaze: The lemon glaze adds a touch of sweetness and a glossy finish that makes these cookies as visually appealing as they are delicious.
- Quick and Easy: With a prep time of about 20 minutes and a total bake time of 10-12 minutes, these cookies come together quickly, making them perfect for any occasion.
- Customizable: You can adjust the glaze, add sprinkles, or even add other flavorings like vanilla or lavender to make these cookies your own.
Preparation and Cooking Time For Glazed Lemon Cookies
- Total Time: 45 minutes (including cooling and glazing)
- Preparation Time: 20 minutes
- Baking Time: 10-12 minutes
- Servings: About 24 cookies
- Calories per serving: Approximately 100-120 calories per cookie
- Key Nutrients: Carbs: 15g, Fat: 6g, Protein: 1g
Ingredients Of Glazed Lemon Cookies
To make these delicious glazed lemon cookies, you will need the following ingredients:
For the Cookies:
- 2 ½ cups all-purpose flour
- 1 teaspoon baking soda
- ½ teaspoon baking powder
- ½ teaspoon salt
- ½ cup unsalted butter, softened
- 1 cup granulated sugar
- 1 large egg
- 2 tablespoons fresh lemon zest (about 2 lemons)
- 2 tablespoons fresh lemon juice
- 1 teaspoon vanilla extract (optional, but recommended)
- 2 tablespoons milk or cream (if needed for dough consistency)
For the Glaze:
- 1 cup powdered sugar
- 2 tablespoons fresh lemon juice
- 1 teaspoon lemon zest (optional, for extra flavor)
- 1 tablespoon milk (to thin the glaze if needed)
- Pinch of salt (optional, to balance sweetness)
Ingredient Highlights
- Flour: All-purpose flour is the best choice for creating the perfect soft and chewy texture. It provides structure to the cookie while allowing the lemon flavor to shine.
- Butter: Unsalted butter ensures that you can control the salt level in the cookies, allowing the tanginess of the lemon to be the dominant flavor.
- Sugar: Granulated sugar adds sweetness to the dough and creates a slight crispness around the edges of the cookies once baked.
- Lemon: Fresh lemon zest and lemon juice are essential for achieving that vibrant, zesty lemon flavor. Always opt for fresh lemons rather than bottled juice for the best flavor.
- Egg: The egg helps bind the dough together and contributes to the cookies’ chewy texture.
- Baking Soda and Baking Powder: These leavening agents work together to help the cookies rise and achieve a light, airy texture.
- Glaze Ingredients: Powdered sugar, lemon juice, and zest come together to create a sweet, tangy glaze that adds a beautiful finish to each cookie.
Step-by-Step Instructions For Glazed Lemon Cookies
Follow these easy steps to make your own batch of delicious glazed lemon cookies:
Step 1: Preheat and Prepare
- Preheat the Oven: Preheat your oven to 350°F (175°C) and line two baking sheets with parchment paper or silicone baking mats. This ensures that the cookies won’t stick and bake evenly.
- Mix Dry Ingredients: In a medium bowl, whisk together the flour, baking soda, baking powder, and salt. Set aside.
Step 2: Make the Cookie Dough
- Cream Butter and Sugar: In a large mixing bowl, use an electric mixer to cream together the softened butter and granulated sugar until light and fluffy. This will take about 3-4 minutes. The butter should be soft but not melted, so make sure it’s at room temperature.
- Add Wet Ingredients: Add the egg, lemon zest, lemon juice, and vanilla extract (if using) to the butter mixture. Beat until fully combined. The lemon zest will give the dough a wonderful aroma, and the lemon juice adds the right amount of tang.
- Incorporate Dry Ingredients: Gradually add the dry ingredients to the wet ingredients, mixing just until combined. You want the dough to be thick but pliable. If the dough feels too sticky, add a little milk (start with 1 tablespoon) to help bring it together.
- Chill the Dough: For best results, chill the dough in the fridge for at least 15 minutes before baking. Chilling helps the cookies maintain their shape while baking and prevents them from spreading too much.
Step 3: Shape the Cookies
- Form the Cookies: Scoop out tablespoon-sized portions of dough and roll them into balls. Place them on the prepared baking sheets, spacing them about 2 inches apart to allow room for spreading. Press each ball down lightly with the back of a spoon or your fingers to flatten them slightly.
- Bake the Cookies: Bake in the preheated oven for 10-12 minutes, or until the edges are golden and the centers are set. These cookies will continue to firm up a bit as they cool, so be careful not to over-bake them. The cookies should have a light, golden brown edge and a slightly soft center.
Step 4: Make the Glaze
- Prepare the Glaze: While the cookies are cooling, prepare the glaze. In a small bowl, whisk together the powdered sugar, lemon juice, and lemon zest until smooth. If the glaze is too thick, add a tablespoon of milk to thin it out to your desired consistency. The glaze should be smooth and pourable but not too runny.
Step 5: Glaze the Cookies
- Cool the Cookies: Allow the cookies to cool on the baking sheet for 5 minutes before transferring them to a wire rack to cool completely. Cooling the cookies before glazing helps prevent the glaze from melting too much.
- Glaze the Cookies: Once the cookies are completely cool, drizzle or spoon the glaze over the top of each cookie. You can cover the cookies completely or just drizzle a little bit for a decorative touch. Allow the glaze to set for about 10 minutes before serving or storing the cookies.
Optional Garnish:
- Sprinkles: Add colorful sprinkles or sanding sugar on top of the glaze for a festive look.
- Extra Lemon Zest: For an added burst of flavor, top the cookies with a little extra fresh lemon zest.
How to Serve Glazed Lemon Cookies
Glazed lemon cookies are perfect for a variety of occasions. Here are some ideas on how to serve them:
- Afternoon Tea: Pair these cookies with a pot of Earl Grey tea or iced tea for a refreshing and light dessert.
- Picnics: Pack these cookies for a picnic in the park or beach outing. Their fresh, citrusy flavor is perfect for outdoor eating.
- Gift Giving: Glazed lemon cookies make an excellent gift. Place them in a pretty tin or jar and present them to family, friends, or coworkers as a thoughtful homemade treat.
- Dessert Table: Serve them as part of a dessert table at a gathering, where their bright, sunny color will stand out and complement other sweets.
Tips for Perfect Glazed Lemon Cookies
Here are some tips and tricks to make sure your glazed lemon cookies turn out perfectly every time:
- Use Fresh Lemons: Always use fresh lemon zest and juice for the most intense flavor. The zest, in particular, gives the cookies a wonderful fragrance that you can’t get from bottled lemon juice.
- Chill the Dough: Chilling the dough helps prevent the cookies from spreading too much while baking, which can result in a thinner cookie. It also improves the texture and flavor.
- Don’t Overmix the Dough: Overmixing can cause the cookies to be tough. Once you’ve added the dry ingredients, mix just until the dough comes together.
- Test for Doneness: The cookies are done when the edges are golden and the centers are set. If they still look too soft in the middle, give them a minute or two more in the oven. But be careful not to overbake; you want the cookies to stay soft and chewy.
- Allow the Glaze to Set: The glaze will harden as it sets, so make sure to let the cookies cool and the glaze firm up before storing them.
Variations of Glazed Lemon Cookies
If you’re looking for different twists on the classic glazed lemon cookie recipe, here are a few variations you can try:
- Lemon Lavender Cookies: Add a teaspoon of dried lavender to the dough for a fragrant, floral twist on the lemon flavor.
- Lemon Almond Cookies: Incorporate ¼ teaspoon of almond extract into the dough for a subtle nutty flavor that pairs perfectly with lemon.
- Blueberry Lemon Cookies: Add fresh or frozen blueberries to the dough for a fruity burst with each bite.
- Lemon Coconut Cookies: Mix shredded coconut into the dough for a tropical variation.
- Lemon Poppy Seed Cookies: Add a tablespoon of poppy seeds for added texture and flavor.
Storing Glazed Lemon Cookies
These cookies are best enjoyed fresh, but they can be stored for later if needed:
- Room Temperature: Store the cookies in an airtight container at room temperature for up to 5 days. Make sure the glaze has set before stacking them to prevent sticking.
- Freezing: You can freeze the cookies before glazing. To freeze, place the baked cookies on a baking sheet and freeze for about 1 hour. Once frozen, transfer the cookies to an airtight container or freezer bag and store for up to 3 months. When ready to enjoy, thaw the cookies and glaze them once they are at room temperature.
- Glazed Cookies: If you’ve already glazed the cookies, they should be stored in an airtight container for up to 3 days. The glaze will soften a bit over time, but the cookies will still taste delicious.

Glazed Lemon Cookies
- Total Time: 45 minutes (including cooling and glazing)
Ingredients
For the Cookies:
- 2 ½ cups all-purpose flour
- 1 teaspoon baking soda
- ½ teaspoon baking powder
- ½ teaspoon salt
- ½ cup unsalted butter, softened
- 1 cup granulated sugar
- 1 large egg
- 2 tablespoons fresh lemon zest (about 2 lemons)
- 2 tablespoons fresh lemon juice
- 1 teaspoon vanilla extract (optional, but recommended)
- 2 tablespoons milk or cream (if needed for dough consistency)
For the Glaze:
- 1 cup powdered sugar
- 2 tablespoons fresh lemon juice
- 1 teaspoon lemon zest (optional, for extra flavor)
- 1 tablespoon milk (to thin the glaze if needed)
- Pinch of salt (optional, to balance sweetness)
Ingredient Highlights
- Flour: All-purpose flour is the best choice for creating the perfect soft and chewy texture. It provides structure to the cookie while allowing the lemon flavor to shine.
- Butter: Unsalted butter ensures that you can control the salt level in the cookies, allowing the tanginess of the lemon to be the dominant flavor.
- Sugar: Granulated sugar adds sweetness to the dough and creates a slight crispness around the edges of the cookies once baked.
- Lemon: Fresh lemon zest and lemon juice are essential for achieving that vibrant, zesty lemon flavor. Always opt for fresh lemons rather than bottled juice for the best flavor.
- Egg: The egg helps bind the dough together and contributes to the cookies’ chewy texture.
- Baking Soda and Baking Powder: These leavening agents work together to help the cookies rise and achieve a light, airy texture.
- Glaze Ingredients: Powdered sugar, lemon juice, and zest come together to create a sweet, tangy glaze that adds a beautiful finish to each cookie.
Instructions
Step 1: Preheat and Prepare
- Preheat the Oven: Preheat your oven to 350°F (175°C) and line two baking sheets with parchment paper or silicone baking mats. This ensures that the cookies won’t stick and bake evenly.
- Mix Dry Ingredients: In a medium bowl, whisk together the flour, baking soda, baking powder, and salt. Set aside.
Step 2: Make the Cookie Dough
- Cream Butter and Sugar: In a large mixing bowl, use an electric mixer to cream together the softened butter and granulated sugar until light and fluffy. This will take about 3-4 minutes. The butter should be soft but not melted, so make sure it’s at room temperature.
- Add Wet Ingredients: Add the egg, lemon zest, lemon juice, and vanilla extract (if using) to the butter mixture. Beat until fully combined. The lemon zest will give the dough a wonderful aroma, and the lemon juice adds the right amount of tang.
- Incorporate Dry Ingredients: Gradually add the dry ingredients to the wet ingredients, mixing just until combined. You want the dough to be thick but pliable. If the dough feels too sticky, add a little milk (start with 1 tablespoon) to help bring it together.
- Chill the Dough: For best results, chill the dough in the fridge for at least 15 minutes before baking. Chilling helps the cookies maintain their shape while baking and prevents them from spreading too much.
Step 3: Shape the Cookies
- Form the Cookies: Scoop out tablespoon-sized portions of dough and roll them into balls. Place them on the prepared baking sheets, spacing them about 2 inches apart to allow room for spreading. Press each ball down lightly with the back of a spoon or your fingers to flatten them slightly.
- Bake the Cookies: Bake in the preheated oven for 10-12 minutes, or until the edges are golden and the centers are set. These cookies will continue to firm up a bit as they cool, so be careful not to over-bake them. The cookies should have a light, golden brown edge and a slightly soft center.
Step 4: Make the Glaze
- Prepare the Glaze: While the cookies are cooling, prepare the glaze. In a small bowl, whisk together the powdered sugar, lemon juice, and lemon zest until smooth. If the glaze is too thick, add a tablespoon of milk to thin it out to your desired consistency. The glaze should be smooth and pourable but not too runny.
Step 5: Glaze the Cookies
- Cool the Cookies: Allow the cookies to cool on the baking sheet for 5 minutes before transferring them to a wire rack to cool completely. Cooling the cookies before glazing helps prevent the glaze from melting too much.
- Glaze the Cookies: Once the cookies are completely cool, drizzle or spoon the glaze over the top of each cookie. You can cover the cookies completely or just drizzle a little bit for a decorative touch. Allow the glaze to set for about 10 minutes before serving or storing the cookies.
Optional Garnish:
- Sprinkles: Add colorful sprinkles or sanding sugar on top of the glaze for a festive look.
- Extra Lemon Zest: For an added burst of flavor, top the cookies with a little extra fresh lemon zest.
- Prep Time: 20 minutes
- Cook Time: 10-12 minutes
Nutrition
- Serving Size: 24 cookies
- Calories: 100-120
- Fat: 6g
- Carbohydrates: 15g
- Protein: 1g
Conclusion
Glazed lemon cookies offer a delightful combination of tangy lemon flavor and sweet, glossy glaze, making them a perfect treat for any occasion. Whether you’re looking for a refreshing dessert to enjoy with your afternoon tea, a thoughtful homemade gift, or simply a delicious snack, these cookies won’t disappoint. Their bright, zesty flavor and soft texture, paired with the glossy glaze, make them a treat everyone will enjoy. So, next time you’re in the mood for a citrusy indulgence, reach for this simple yet irresistible recipe. Happy baking!