
Introduction
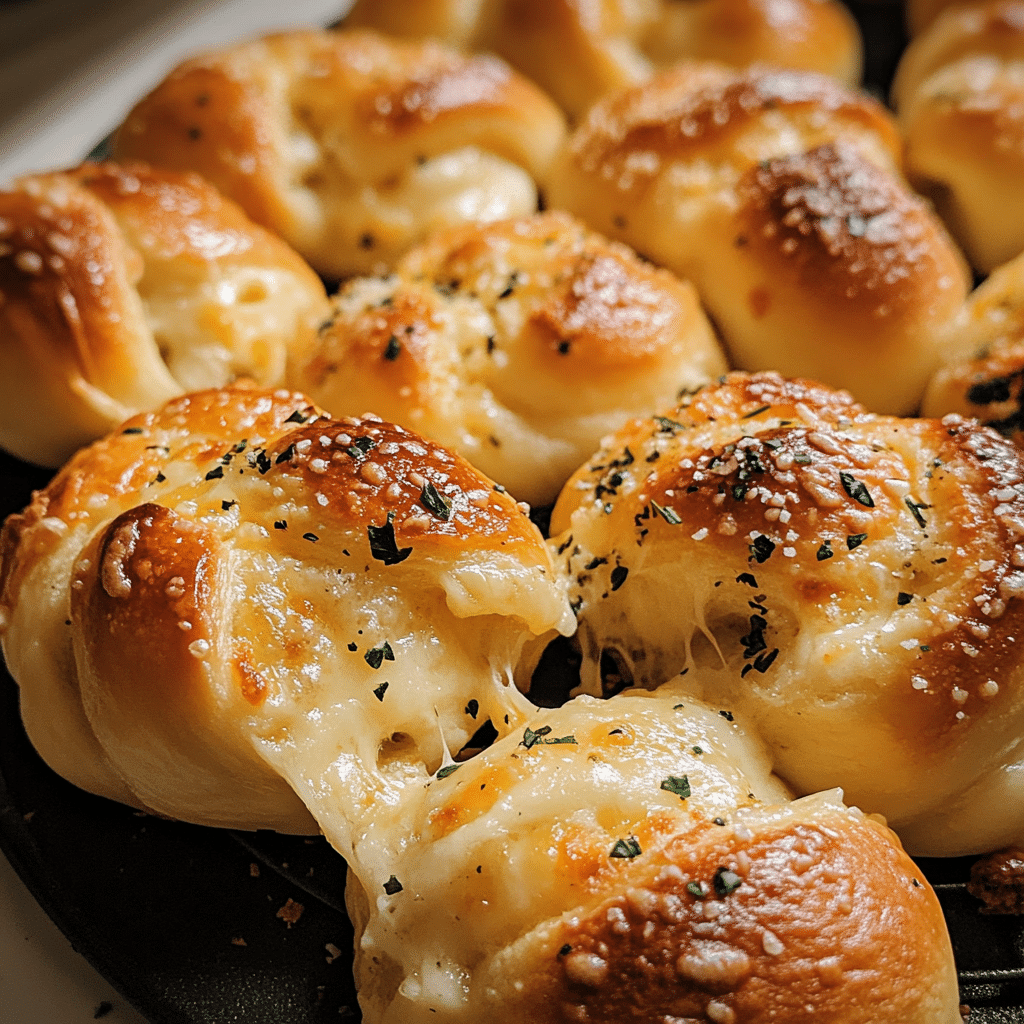
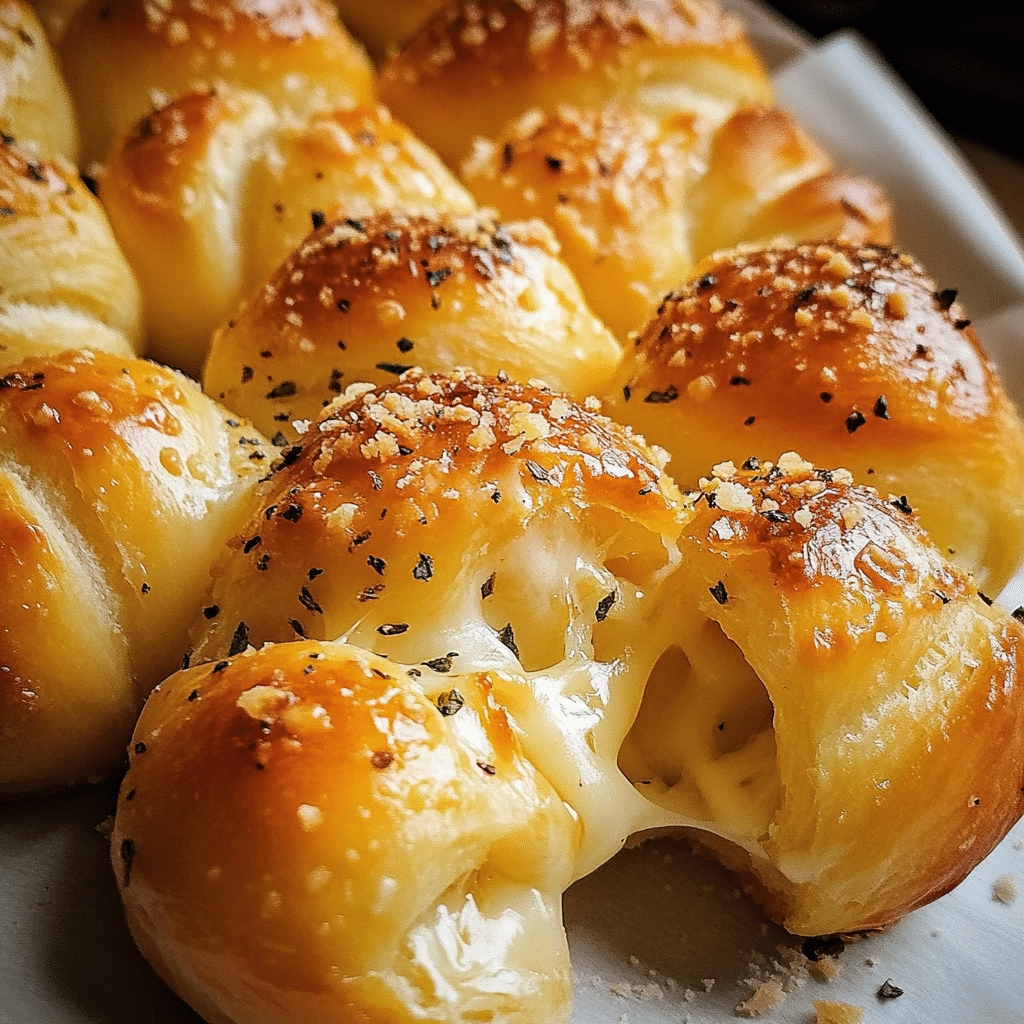
Cheese-Filled Garlic Knots are the ultimate comfort food. Combining the best of two worlds—soft, buttery, garlicky bread and gooey, melted cheese—these knots are a hit at any gathering. Whether you’re serving them as an appetizer, snack, or side dish, they’re sure to impress with their irresistible aroma and mouthwatering flavor.
This recipe elevates the classic garlic knot by filling the dough with a blend of cheese, creating pockets of melty goodness with every bite. The tender dough is seasoned with garlic, parsley, and a rich butter glaze, making it a perfect combination of flavors. These cheese-filled garlic knots are easy to make and can be customized to suit your preferences, from the type of cheese you use to the level of garlic you add.
In this article, we’ll dive into why Cheese-Filled Garlic Knots are a must-try, guide you through a step-by-step process on how to make them, and offer tips on how to make them even more delicious. Whether you’re a garlic knot aficionado or someone looking for a new snack idea, this cheesy twist is sure to become a favorite.
Why You’ll Love This Recipe
- Cheesy Goodness: The melty cheese inside each knot adds a rich and creamy element that pairs perfectly with the buttery, garlicky dough.
- Easy to Make: With just a few basic ingredients, these cheese-filled garlic knots are surprisingly easy to prepare. No need to be a professional baker!
- Perfect for Any Occasion: Whether you’re making them for a family dinner, a party appetizer, or as a side for pasta, these garlic knots will steal the show.
- Customizable: Feel free to get creative by adding your favorite herbs, cheeses, or spices to personalize the recipe. You can even experiment with different fillings, such as pepperoni or vegetables.
- Vegetarian-Friendly: The recipe is completely vegetarian, making it a great option for those who avoid meat but still want a savory, satisfying snack.
Preparation Time and Servings
- Total Time: 2 hours (including 1-hour dough rising time)
- Servings: This recipe makes approximately 12-16 garlic knots, depending on how large you make them.
- Nutrition Facts (per serving):
- Calories: 220
- Protein: 8g
- Carbs: 28g
- Fat: 9g
Ingredients
For the Dough:
- 3 ½ cups all-purpose flour: Provides the structure for the dough and gives it that light, chewy texture.
- 1 teaspoon salt: Enhances the flavor of the dough.
- 1 tablespoon sugar: Helps activate the yeast and balances the savory flavors.
- 1 packet (2 ¼ teaspoons) active dry yeast: The key ingredient that makes the dough rise and become fluffy.
- 1 ½ cups warm water (110°F/45°C): Activates the yeast to help the dough rise.
- 2 tablespoons olive oil: Adds richness to the dough and helps it become tender.
For the Filling:
- 1 ½ cups shredded mozzarella cheese: The classic cheese that melts beautifully inside the garlic knots.
- ½ cup ricotta cheese: Adds creaminess and helps to create a smooth, melt-in-your-mouth texture inside the knots.
- ¼ cup grated parmesan cheese: Adds a nutty, savory flavor to complement the mozzarella.
- 1 teaspoon garlic powder: For that subtle garlic flavor throughout the cheese filling.
- 1 teaspoon dried oregano: A lovely herb that enhances the overall flavor of the filling.
For the Garlic Butter Topping:
- 6 tablespoons unsalted butter: Gives the knots their rich, buttery flavor and helps them become golden brown.
- 4 cloves garlic, minced: Fresh garlic adds a punch of flavor that pairs perfectly with the cheesy filling.
- 1 tablespoon fresh parsley, chopped: Adds a burst of color and a fresh flavor to the topping.
- ½ teaspoon crushed red pepper flakes (optional): For a bit of heat, you can add some crushed red pepper flakes to the garlic butter.
Optional Garnishes:
- Extra parmesan cheese: A light sprinkle of parmesan on top before serving gives these knots an extra savory punch.
- Fresh basil or oregano: To garnish and add a fresh herbaceous note.
Step-by-Step Preparation
FIRST STEP: PREPARE THE DOUGH
- Activate the Yeast: In a small bowl, combine the warm water, sugar, and active dry yeast. Stir gently and let it sit for about 5-10 minutes, or until the mixture becomes frothy and bubbly. This indicates that the yeast is active and ready to rise.
- Mix the Dry Ingredients: In a large mixing bowl, whisk together the flour and salt. Once the yeast mixture is ready, pour it into the dry ingredients along with the olive oil. Stir with a wooden spoon or a dough hook attachment if using a stand mixer.
- Knead the Dough: Turn the dough out onto a lightly floured surface and knead it for about 5-7 minutes until it becomes smooth and elastic. If using a stand mixer, use the dough hook on medium speed for about 4-5 minutes.
- Let the Dough Rise: Lightly oil another bowl and place the dough inside, turning it once to coat it with the oil. Cover the bowl with a clean kitchen towel and let it rise in a warm place for about 1 hour, or until it doubles in size.
SECOND STEP: PREPARE THE CHEESE FILLING
- Mix the Cheese Filling: While the dough is rising, prepare the cheese filling. In a medium-sized bowl, combine the shredded mozzarella, ricotta cheese, parmesan cheese, garlic powder, and oregano. Stir until the ingredients are fully combined, and set aside.
THIRD STEP: FORM THE CHEESE-FILLED GARLIC KNOTS
- Preheat the Oven: Preheat your oven to 375°F (190°C). Line a large baking sheet with parchment paper or lightly grease it with non-stick spray.
- Shape the Dough: Once the dough has risen, punch it down gently to release the air. Divide the dough into 12 equal portions. Roll each portion into a ball, then roll it into a long rope about 8 inches long.
- Add the Cheese Filling: Flatten each rope slightly with your fingers, and spoon about 1-2 tablespoons of the cheese filling into the center of each piece of dough. Fold the dough over the filling to enclose it, then tie it into a knot. Place the knot on the prepared baking sheet, and repeat with the remaining dough.
- Let the Knots Rise: Once all the knots are shaped, cover them loosely with a kitchen towel and let them rise for about 20-30 minutes, or until slightly puffed.
FOURTH STEP: GARLIC BUTTER GLAZE AND BAKING
- Prepare the Garlic Butter: In a small saucepan, melt the butter over medium heat. Add the minced garlic and cook for 1-2 minutes until fragrant but not browned. Stir in the chopped parsley and crushed red pepper flakes (if using).
- Brush the Knots: Once the garlic butter is ready, brush it generously over the top of each garlic knot, making sure to coat them well. Bake the garlic knots in the preheated oven for 20-25 minutes, or until golden brown and puffed.
- Finishing Touches: Remove the garlic knots from the oven and immediately brush them with any remaining garlic butter. Optionally, sprinkle with extra parmesan cheese and fresh herbs.
- Serve: Allow the garlic knots to cool slightly before serving. Enjoy them warm as a delicious appetizer, snack, or side dish.
How to Serve Cheese-Filled Garlic Knots
Cheese-Filled Garlic Knots are incredibly versatile and can be served in a variety of ways. Here are some great ideas for serving them:
1. As an Appetizer:
Serve them warm with a side of marinara sauce for dipping. The rich, melty cheese inside the knots pairs wonderfully with the tangy sauce.
2. As a Side Dish for Pasta:
These cheesy knots are the perfect complement to a hearty pasta dish. Pair them with spaghetti, lasagna, or any other Italian meal to complete your dinner.
3. For Game Day or Parties:
Serve them at your next gathering or game day event. These cheese-filled garlic knots are easy to share and are sure to be a crowd-pleaser!
4. Snack Time:
Enjoy them as a snack when you’re craving something savory and cheesy. They’re great on their own or with a side of marinara or ranch dipping sauce.
Additional Tips and Variations
- Make Ahead: You can prepare the garlic knots ahead of time. After shaping the knots, cover them and refrigerate them for up to 24 hours before baking. Just let them come to room temperature before baking.
- Freezing: You can also freeze unbaked garlic knots. After forming them, place them on a baking sheet and freeze them until solid. Once frozen, transfer them to a freezer bag or container. When ready to bake, cook directly from frozen at 375°F (190°C) for 25-30 minutes.
- Customizing the Filling: While mozzarella is a classic choice, you can experiment with other cheeses, such as cheddar, fontina, or gouda. You can also add herbs, sautéed spinach,
or even pepperoni for extra flavor.
- Make it Vegan: For a vegan version, substitute dairy-free cheese alternatives and use plant-based butter for the garlic glaze.
Freezing and Storage
- Storage: Store leftover cheese-filled garlic knots in an airtight container at room temperature for up to 2 days. Reheat them in the oven at 350°F (175°C) for 5-7 minutes to restore their crispiness.
- Freezing: After baking, let the knots cool completely. Place them in a freezer-safe container or bag and freeze for up to 3 months. Reheat them in the oven at 350°F (175°C) for 10-15 minutes or until heated through.

Cheese-Filled Garlic Knots
- Total Time: 2 hours
Ingredients
For the Dough:
- 3 ½ cups all-purpose flour: Provides the structure for the dough and gives it that light, chewy texture.
- 1 teaspoon salt: Enhances the flavor of the dough.
- 1 tablespoon sugar: Helps activate the yeast and balances the savory flavors.
- 1 packet (2 ¼ teaspoons) active dry yeast: The key ingredient that makes the dough rise and become fluffy.
- 1 ½ cups warm water (110°F/45°C): Activates the yeast to help the dough rise.
- 2 tablespoons olive oil: Adds richness to the dough and helps it become tender.
For the Filling:
- 1 ½ cups shredded mozzarella cheese: The classic cheese that melts beautifully inside the garlic knots.
- ½ cup ricotta cheese: Adds creaminess and helps to create a smooth, melt-in-your-mouth texture inside the knots.
- ¼ cup grated parmesan cheese: Adds a nutty, savory flavor to complement the mozzarella.
- 1 teaspoon garlic powder: For that subtle garlic flavor throughout the cheese filling.
- 1 teaspoon dried oregano: A lovely herb that enhances the overall flavor of the filling.
For the Garlic Butter Topping:
- 6 tablespoons unsalted butter: Gives the knots their rich, buttery flavor and helps them become golden brown.
- 4 cloves garlic, minced: Fresh garlic adds a punch of flavor that pairs perfectly with the cheesy filling.
- 1 tablespoon fresh parsley, chopped: Adds a burst of color and a fresh flavor to the topping.
- ½ teaspoon crushed red pepper flakes (optional): For a bit of heat, you can add some crushed red pepper flakes to the garlic butter.
Optional Garnishes:
- Extra parmesan cheese: A light sprinkle of parmesan on top before serving gives these knots an extra savory punch.
- Fresh basil or oregano: To garnish and add a fresh herbaceous note.
Instructions
FIRST STEP: PREPARE THE DOUGH
- Activate the Yeast: In a small bowl, combine the warm water, sugar, and active dry yeast. Stir gently and let it sit for about 5-10 minutes, or until the mixture becomes frothy and bubbly. This indicates that the yeast is active and ready to rise.
- Mix the Dry Ingredients: In a large mixing bowl, whisk together the flour and salt. Once the yeast mixture is ready, pour it into the dry ingredients along with the olive oil. Stir with a wooden spoon or a dough hook attachment if using a stand mixer.
- Knead the Dough: Turn the dough out onto a lightly floured surface and knead it for about 5-7 minutes until it becomes smooth and elastic. If using a stand mixer, use the dough hook on medium speed for about 4-5 minutes.
- Let the Dough Rise: Lightly oil another bowl and place the dough inside, turning it once to coat it with the oil. Cover the bowl with a clean kitchen towel and let it rise in a warm place for about 1 hour, or until it doubles in size.
SECOND STEP: PREPARE THE CHEESE FILLING
- Mix the Cheese Filling: While the dough is rising, prepare the cheese filling. In a medium-sized bowl, combine the shredded mozzarella, ricotta cheese, parmesan cheese, garlic powder, and oregano. Stir until the ingredients are fully combined, and set aside.
THIRD STEP: FORM THE CHEESE-FILLED GARLIC KNOTS
- Preheat the Oven: Preheat your oven to 375°F (190°C). Line a large baking sheet with parchment paper or lightly grease it with non-stick spray.
- Shape the Dough: Once the dough has risen, punch it down gently to release the air. Divide the dough into 12 equal portions. Roll each portion into a ball, then roll it into a long rope about 8 inches long.
- Add the Cheese Filling: Flatten each rope slightly with your fingers, and spoon about 1-2 tablespoons of the cheese filling into the center of each piece of dough. Fold the dough over the filling to enclose it, then tie it into a knot. Place the knot on the prepared baking sheet, and repeat with the remaining dough.
- Let the Knots Rise: Once all the knots are shaped, cover them loosely with a kitchen towel and let them rise for about 20-30 minutes, or until slightly puffed.
FOURTH STEP: GARLIC BUTTER GLAZE AND BAKING
- Prepare the Garlic Butter: In a small saucepan, melt the butter over medium heat. Add the minced garlic and cook for 1-2 minutes until fragrant but not browned. Stir in the chopped parsley and crushed red pepper flakes (if using).
- Brush the Knots: Once the garlic butter is ready, brush it generously over the top of each garlic knot, making sure to coat them well. Bake the garlic knots in the preheated oven for 20-25 minutes, or until golden brown and puffed.
- Finishing Touches: Remove the garlic knots from the oven and immediately brush them with any remaining garlic butter. Optionally, sprinkle with extra parmesan cheese and fresh herbs.
- Serve: Allow the garlic knots to cool slightly before serving. Enjoy them warm as a delicious appetizer, snack, or side dish.
Nutrition
- Serving Size: 12-16
- Calories: 220
- Fat: 9g
- Carbohydrates: 28g
- Protein: 8g
Conclusion
Cheese-Filled Garlic Knots are the perfect combination of savory, cheesy goodness and garlicky perfection. Whether you’re preparing them for a family meal, a party, or just as a delicious snack, these knots are sure to impress. With a soft, buttery dough, a gooey cheese filling, and a flavorful garlic butter topping, they’re an irresistible treat that’s easy to make and completely customizable. Try them today and enjoy the delicious, comforting flavors in every bite!