

Introduction
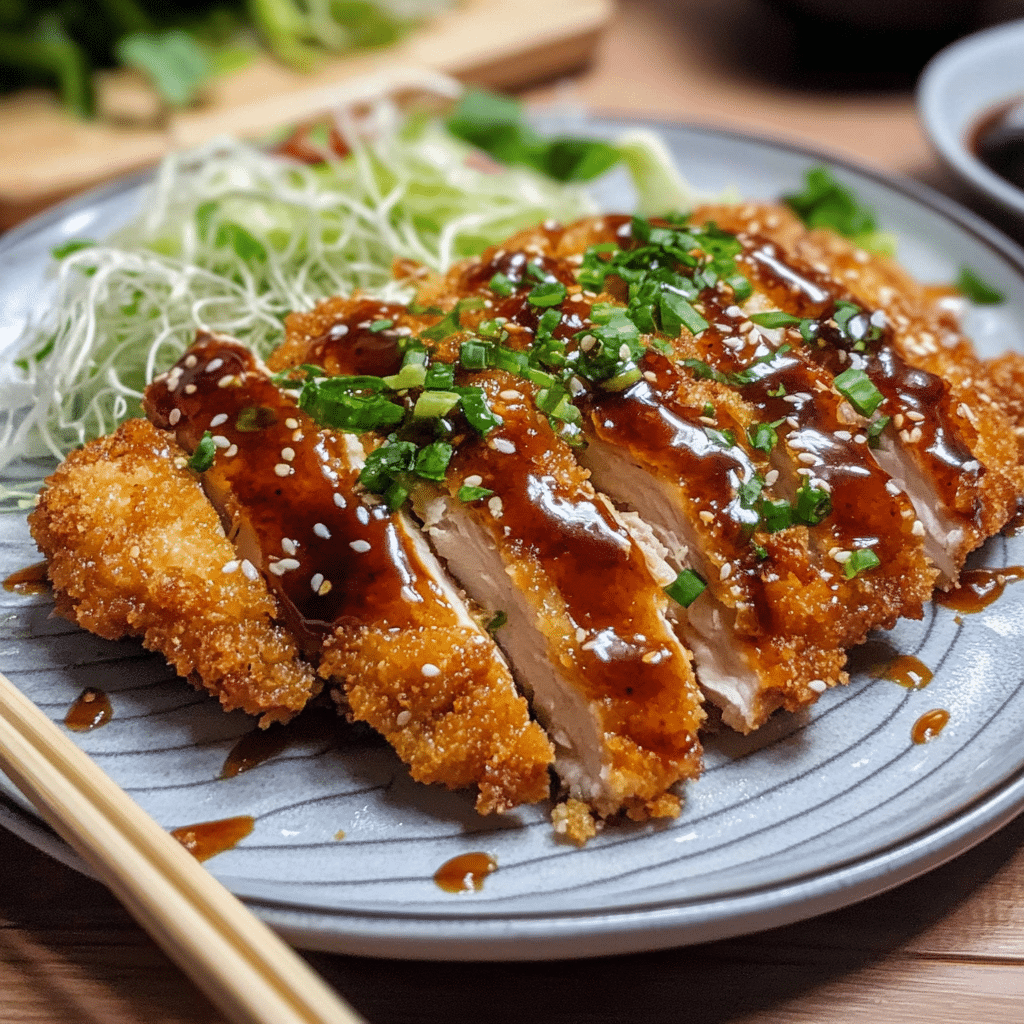
Baked Chicken Katsu is a healthier twist on the classic Japanese fried chicken dish, chicken katsu. Traditionally deep-fried, this baked version offers the same crispy, golden-brown coating while significantly reducing the amount of oil used in cooking. Perfect for a weeknight dinner or a weekend meal, Baked Chicken Katsu is easy to prepare and just as flavorful as its fried counterpart. With juicy chicken fillets coated in crispy panko breadcrumbs and baked to perfection, this dish is a must-try for any fan of Japanese cuisine.
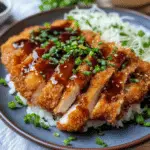
Whether you enjoy it served with steamed rice, a simple salad, or dipped in tangy tonkatsu sauce, Baked Chicken Katsu will become a favorite in your recipe collection. This dish is simple, comforting, and customizable, making it ideal for busy families or anyone looking for a satisfying meal with fewer calories.
Perfect for:
- Weeknight dinners
- Meal prep for lunchboxes
- Japanese-themed dinner parties
- Families and kids who love crispy chicken
- Health-conscious food lovers
Why You’ll Love This Recipe
Here’s why Baked Chicken Katsu will become a staple in your home:
- Crispy Coating, Healthier Option: The panko breadcrumbs create a crunchy, crispy texture without the need for frying, giving you all the flavor without the extra oil.
- Juicy, Tender Chicken: The chicken remains moist and tender on the inside, thanks to the quick baking process.
- Quick and Easy to Prepare: This recipe is straightforward and takes minimal prep time, making it perfect for busy weeknights.
- Versatile Meal: You can serve Baked Chicken Katsu with a variety of sides, such as steamed rice, coleslaw, or even a fresh garden salad.
- Customizable: Add a drizzle of your favorite sauce, such as a homemade tonkatsu sauce or even a sweet and spicy chili sauce, to tailor the dish to your taste.
Preparation and Cooking Time
- Total Time: 40 minutes
- Preparation Time: 15 minutes
- Cooking Time: 25 minutes
- Servings: 4
- Calories per Serving: Approximately 350-400 calories
- Key Nutrients: Protein: 32g, Carbs: 40g, Fat: 15g
Ingredients
To make this delicious and crispy Baked Chicken Katsu, here’s what you’ll need:
- 4 boneless, skinless chicken breasts (about 1 ½ pounds)
- 1 cup all-purpose flour
- 2 large eggs
- 2 cups panko breadcrumbs (Japanese-style breadcrumbs for extra crispiness)
- 1 teaspoon garlic powder
- 1 teaspoon onion powder
- ½ teaspoon salt
- ½ teaspoon black pepper
- 1 tablespoon sesame oil (optional for flavor)
- 2 tablespoons olive oil or cooking spray (for baking)
- Tonkatsu sauce (for serving, optional)
- Lemon wedges (for serving, optional)
- Fresh parsley or green onions (for garnish, optional)
Ingredient Highlights
- Panko Breadcrumbs: Panko is a Japanese-style breadcrumb that is lighter and crispier than regular breadcrumbs, which gives the katsu its signature crunch. Using panko ensures that the chicken remains light and crispy, even without frying.
- Chicken Breasts: Boneless, skinless chicken breasts provide a lean protein base for this dish, making it a healthier option. They also cook quickly, ensuring the meat stays tender and juicy.
- Tonkatsu Sauce: This tangy, sweet sauce is typically served with chicken katsu in Japan. You can buy it in stores or easily make your own at home by combining ketchup, Worcestershire sauce, soy sauce, and a bit of sugar.
- Sesame Oil: Adding a touch of sesame oil to the breading mixture imparts a subtle nutty flavor that enhances the overall taste of the katsu.
Step-by-Step Instructions
Follow these simple steps to make the perfect Baked Chicken Katsu:
Prepare the Chicken:
- Prep the Chicken: Start by tenderizing the chicken breasts. Place each breast between two sheets of plastic wrap or parchment paper. Gently pound the chicken using a meat mallet or rolling pin to an even thickness of about ½ inch. This helps the chicken cook evenly and ensures it stays juicy.
- Season the Chicken: Season both sides of each chicken breast with salt and black pepper. This simple seasoning will enhance the flavor of the chicken without overpowering the crispy coating.
Prepare the Breading Station:
- Set Up Breading Stations: In one shallow bowl, place the flour. In another, whisk the eggs. In a third shallow bowl, combine the panko breadcrumbs, garlic powder, onion powder, and sesame oil. Mix everything well to distribute the seasonings evenly throughout the breadcrumbs.
- Coat the Chicken: Dredge each chicken breast in the flour, ensuring it is coated evenly. Shake off any excess flour. Then dip the chicken into the egg mixture, making sure it’s fully covered. Finally, coat the chicken in the seasoned panko breadcrumbs, pressing gently to ensure the breadcrumbs stick.
Bake the Chicken:
- Prepare the Baking Sheet: Lightly grease a baking sheet with olive oil or spray with cooking spray to prevent the chicken from sticking.
- Place Chicken on Baking Sheet: Arrange the breaded chicken breasts in a single layer on the prepared baking sheet. Be sure to leave space between each piece for even cooking.
- Bake the Chicken: Preheat your oven to 400°F (200°C). Bake the chicken for 20-25 minutes, or until the chicken is cooked through, the coating is golden brown, and a meat thermometer reads 165°F (75°C) in the center of the chicken. For an extra crispy finish, you can broil the chicken for the last 2-3 minutes of baking.
Serve and Garnish:
- Serve the Katsu: Once baked, remove the chicken from the oven and let it rest for a couple of minutes before slicing it into strips. This ensures that the juices stay inside the chicken.
- Add Toppings: Serve the chicken katsu with tonkatsu sauce on the side for dipping, or drizzle it over the chicken. Garnish with fresh parsley or green onions for an added touch of color and flavor. Add a squeeze of lemon juice for extra freshness.
How to Serve Baked Chicken Katsu
Baked Chicken Katsu can be served in a variety of ways, making it versatile for different occasions:
- With Steamed Rice: Traditionally, chicken katsu is served with a side of steamed rice. The rice soaks up the savory juices from the chicken and sauce, making for a complete and satisfying meal.
- With Cabbage Salad: A simple cabbage slaw or salad with a light vinaigrette adds a refreshing crunch that complements the crispy chicken.
- As a Sandwich: For a quick lunch or snack, serve the baked chicken katsu in a sandwich with some lettuce, tomato, and a drizzle of tonkatsu sauce.
- With Miso Soup: Pair the chicken katsu with a bowl of miso soup for a comforting Japanese-inspired meal.
- On a Bento Box: Slice the chicken and pack it into a bento box alongside rice, pickled vegetables, and a hard-boiled egg for a well-rounded meal.
Additional Tips for Baked Chicken Katsu
Here are some additional tips to help you make the best Baked Chicken Katsu:
- Tenderize the Chicken: Tenderizing the chicken is key to ensuring it cooks evenly and remains juicy. Don’t skip this step!
- Use Panko for Extra Crunch: Panko breadcrumbs create the light, crispy coating that makes chicken katsu so irresistible. If you can’t find panko, you can substitute regular breadcrumbs, but the texture won’t be quite as light.
- Bake on a Rack: For the crispiest katsu, you can bake the chicken on a wire rack set over the baking sheet. This allows air to circulate around the chicken, ensuring that the coating gets crispy on all sides.
- Broil for Extra Crispiness: If you want an even crispier finish, you can broil the chicken for the last 2-3 minutes of baking. Just be sure to keep an eye on it to avoid burning.
- Serve Immediately: For the best texture, serve the chicken immediately after baking. If left too long, the crispy coating may become soggy.
Recipe Variations of Baked Chicken Katsu
Here are some variations of Baked Chicken Katsu that you can try to keep things exciting:
- Curry-flavored Katsu: Add curry powder to the panko breadcrumbs for a unique twist that adds a mild spice to the dish.
- Spicy Katsu: Mix in some chili flakes or cayenne pepper with the breadcrumbs for a spicy version of the classic katsu.
- Vegetarian Katsu: Replace the chicken with a hearty vegetable like eggplant or tofu for a vegetarian take on this dish.
- Katsu with Cheese: Add a slice of cheese on top of the chicken during the last few minutes of baking to create a cheesy, melt-in-your-mouth version of chicken katsu.
- Katsu with Avocado: Top the chicken with sliced avocado for a creamy contrast to the crispy coating.
- Crispy Chicken Katsu Strips: Instead of using whole chicken breasts, slice the chicken into strips before breading and baking for bite-sized pieces of crispy goodness.
- Katsu with Spicy Mayo: Serve the chicken with a side of spicy mayo (made by mixing mayonnaise and sriracha) for an extra flavor kick.
Freezing and Storage for Baked Chicken Katsu
- Freezing: Baked Chicken Katsu can be frozen for up to 3 months. To freeze, let the chicken cool completely, then wrap each piece tightly in plastic wrap or foil before placing it in an airtight container or freezer bag. When you’re ready to eat, reheat the chicken in the oven at 375°F (190°C) until hot and crispy.
- Storage: Store leftover Baked Chicken Katsu in an airtight container in the refrigerator for up to 3 days. Reheat the chicken in the oven for the best results, as microwaving may make the coating soggy.
Special Equipment for Baked Chicken Katsu
Here are some items that will make preparing Baked Chicken Katsu easier:
- Meat Mallet: A meat mallet or rolling pin is great for tenderizing the chicken breasts to an even thickness.
- Shallow Bowls: Use shallow bowls for breading the chicken, as they make it easier to coat the chicken evenly.
- Baking Sheet: A large baking sheet ensures the chicken has plenty of space to bake without overcrowding.
- Wire Rack: A wire rack elevates the chicken for even baking and ensures a crispy finish.
- Tongs or Fork: Tongs or a fork are useful for transferring the breaded chicken to the baking sheet without disturbing the coating.
FAQ Section about Baked Chicken Katsu
- Can I use bone-in chicken for this recipe?
You can, but boneless, skinless chicken breasts are best for this recipe. Bone-in chicken will require longer cooking time, and the breading might not stick as well. - Can I fry the chicken instead of baking it?
Yes, you can fry the chicken if you prefer the traditional method. However, baking offers a healthier alternative with less oil. - Can I use gluten-free breadcrumbs?
Yes, gluten-free breadcrumbs work well in this recipe if you need a gluten-free option. - Can I add vegetables to the breading mixture?
Feel free to add finely grated vegetables like carrots or zucchini to the breadcrumbs for added flavor and texture. - How do I make tonkatsu sauce at home?
Combine ¼ cup ketchup, 2 tablespoons Worcestershire sauce, 1 tablespoon soy sauce, 1 tablespoon sugar, and a teaspoon of Dijon mustard for a simple homemade tonkatsu sauce.
Baked Chicken Katsu
- Total Time: 40 minutes
Ingredients
To make this delicious and crispy Baked Chicken Katsu, here’s what you’ll need:
- 4 boneless, skinless chicken breasts (about 1 ½ pounds)
- 1 cup all-purpose flour
- 2 large eggs
- 2 cups panko breadcrumbs (Japanese-style breadcrumbs for extra crispiness)
- 1 teaspoon garlic powder
- 1 teaspoon onion powder
- ½ teaspoon salt
- ½ teaspoon black pepper
- 1 tablespoon sesame oil (optional for flavor)
- 2 tablespoons olive oil or cooking spray (for baking)
- Tonkatsu sauce (for serving, optional)
- Lemon wedges (for serving, optional)
- Fresh parsley or green onions (for garnish, optional)
Ingredient Highlights
- Panko Breadcrumbs: Panko is a Japanese-style breadcrumb that is lighter and crispier than regular breadcrumbs, which gives the katsu its signature crunch. Using panko ensures that the chicken remains light and crispy, even without frying.
- Chicken Breasts: Boneless, skinless chicken breasts provide a lean protein base for this dish, making it a healthier option. They also cook quickly, ensuring the meat stays tender and juicy.
- Tonkatsu Sauce: This tangy, sweet sauce is typically served with chicken katsu in Japan. You can buy it in stores or easily make your own at home by combining ketchup, Worcestershire sauce, soy sauce, and a bit of sugar.
- Sesame Oil: Adding a touch of sesame oil to the breading mixture imparts a subtle nutty flavor that enhances the overall taste of the katsu.
Instructions
Prepare the Chicken:
- Prep the Chicken: Start by tenderizing the chicken breasts. Place each breast between two sheets of plastic wrap or parchment paper. Gently pound the chicken using a meat mallet or rolling pin to an even thickness of about ½ inch. This helps the chicken cook evenly and ensures it stays juicy.
- Season the Chicken: Season both sides of each chicken breast with salt and black pepper. This simple seasoning will enhance the flavor of the chicken without overpowering the crispy coating.
Prepare the Breading Station:
- Set Up Breading Stations: In one shallow bowl, place the flour. In another, whisk the eggs. In a third shallow bowl, combine the panko breadcrumbs, garlic powder, onion powder, and sesame oil. Mix everything well to distribute the seasonings evenly throughout the breadcrumbs.
- Coat the Chicken: Dredge each chicken breast in the flour, ensuring it is coated evenly. Shake off any excess flour. Then dip the chicken into the egg mixture, making sure it’s fully covered. Finally, coat the chicken in the seasoned panko breadcrumbs, pressing gently to ensure the breadcrumbs stick.
Bake the Chicken:
- Prepare the Baking Sheet: Lightly grease a baking sheet with olive oil or spray with cooking spray to prevent the chicken from sticking.
- Place Chicken on Baking Sheet: Arrange the breaded chicken breasts in a single layer on the prepared baking sheet. Be sure to leave space between each piece for even cooking.
- Bake the Chicken: Preheat your oven to 400°F (200°C). Bake the chicken for 20-25 minutes, or until the chicken is cooked through, the coating is golden brown, and a meat thermometer reads 165°F (75°C) in the center of the chicken. For an extra crispy finish, you can broil the chicken for the last 2-3 minutes of baking.
Serve and Garnish:
- Serve the Katsu: Once baked, remove the chicken from the oven and let it rest for a couple of minutes before slicing it into strips. This ensures that the juices stay inside the chicken.
- Add Toppings: Serve the chicken katsu with tonkatsu sauce on the side for dipping, or drizzle it over the chicken. Garnish with fresh parsley or green onions for an added touch of color and flavor. Add a squeeze of lemon juice for extra freshness.
- Prep Time: 15 minutes
- Cook Time: 25 minutes
Nutrition
- Serving Size: 4
- Calories: 350-400
- Fat: 15g
- Carbohydrates: 40g
- Protein: 32g
Conclusion
Baked Chicken Katsu is a delicious, healthier alternative to the classic fried chicken katsu. With its crispy, golden crust and juicy, tender chicken, it’s sure to become a family favorite. Serve it with steamed rice, fresh vegetables, or in a sandwich, and enjoy the flavors of Japan in the comfort of your own home. This simple and versatile dish is perfect for any occasion, from casual weeknight dinners to special meals with loved ones. Try it today, and you’ll see why Baked Chicken Katsu is destined to become a go-to recipe!